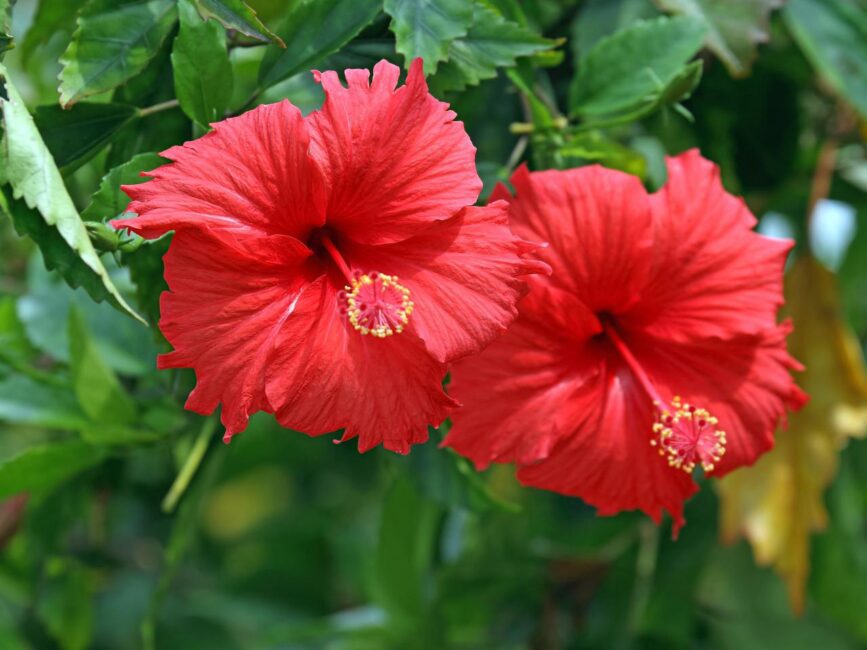
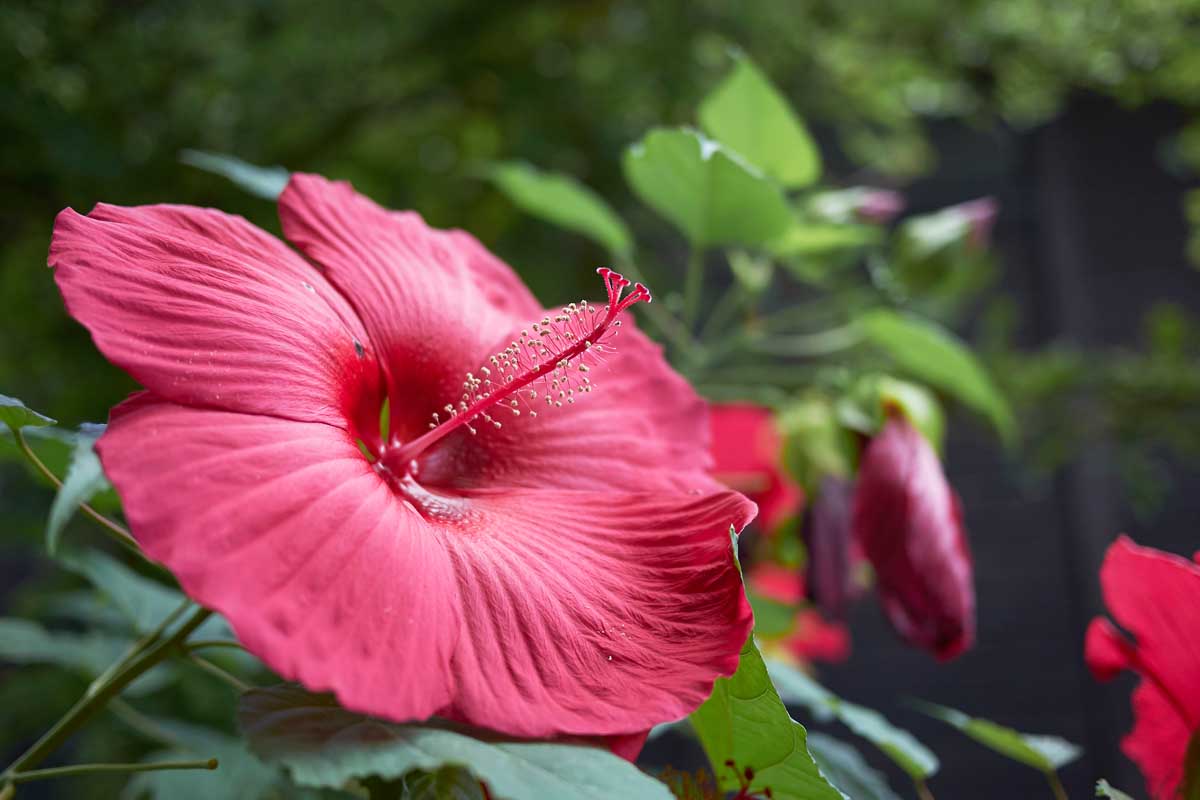
Hibiscus flowers are characterized by their large, trumpet-like blooms that span a spectrum of vibrant colors, have a unique ability to captivate hearts and transform ordinary gardens into enchanting paradises.
But beyond their visual appeal, hibiscus flowers offer a host of benefits that make them a cherished addition to any garden. In this article, we’ll be focusing majorly on how to plant this trumpet-like blossoms.
Types of Hibiscus Flowers
Before diving into the selection process, it’s essential to familiarize yourself with the different types of hibiscus flowers. Here are some of the most popular varieties:
1. Tropical Hibiscus (Hibiscus rosa-sinensis)
Tropical hibiscus, often referred to as Chinese hibiscus, boasts large, showy blooms in a mesmerizing array of colors. These are perfect for adding a touch of the exotic to your garden or patio.
2. Hardy Hibiscus (Hibiscus moscheutos)
Hardy hibiscus, also known as swamp rose mallow, is native to North America. It’s renowned for its enormous, plate-sized flowers that can withstand cold winters. These are ideal for temperate climates.
3. Native Hibiscus (Hibiscus coccineus)
Native hibiscus is another North American variety, known for its striking red blossoms and tolerance to wet conditions. It’s a favorite among hummingbirds and butterflies.
4. Rose of Sharon (Hibiscus syriacus)
Rose of Sharon is a hardy, deciduous hibiscus variety that offers an abundance of delicate, trumpet-shaped flowers. It’s a fantastic choice for creating privacy hedges.
Climate and Location Considerations
Selecting the right hibiscus variety also depends on your climate and garden location. Here are some key factors to consider:
1. Temperature
Tropical hibiscus thrives in warm, tropical climates and requires protection from frost. If you live in a region with cold winters, opt for hardy hibiscus varieties, which can withstand freezing temperatures.
2. Sunlight
Most hibiscus varieties thrive in full sun. Ensure your chosen location receives at least 6-8 hours of direct sunlight daily. Without adequate sunlight, hibiscus may not produce as many flowers.
3. Soil and Drainage
Hibiscus prefers well-draining soil. If your soil is heavy and tends to retain water, consider amending it with organic matter to improve drainage.
4. Space and Pruning
Consider the available space in your garden. Some hibiscus varieties can grow quite large, so plan for adequate spacing. Additionally, regular pruning helps maintain a healthy and shapely plant.
Factors to Look for When Buying Hibiscus Plants
When it’s time to purchase hibiscus plants, keep the following factors in mind:
1. Healthy Foliage
Inspect the plant’s foliage for signs of pests, diseases, or discoloration. Healthy hibiscus should have lush, green leaves.
2. Strong Stems
Check the stems for strength and sturdiness. Avoid plants with weak, spindly stems, as they may struggle to support the weight of the blossoms.
3. Buds and Blooms
Look for plants with unopened buds or fresh blooms. This indicates that the plant is actively flowering and will continue to do so in your garden.
4. Root Health
If possible, examine the root system. A healthy hibiscus should have well-developed, white roots without signs of rot.
Preparing the Garden for Hibiscus: A Step-by-Step Guide
A lush and vibrant hibiscus garden begins with careful preparation. Before you start planting, it’s crucial to choose the right location, properly condition the soil, and gather the necessary tools and materials.
Read Also: Ways to Dispose Styrofoam Waste Properly
In this guide, we’ll walk you through each of these essential steps to ensure your hibiscus plants thrive.
Step 1: Selecting an Appropriate Planting Location
Choosing the perfect spot for your hibiscus is the first and arguably the most critical step. Here’s what to consider:
Sunlight:
Hibiscus plants love the sun. Look for a location that receives at least 6 to 8 hours of direct sunlight each day. South or southeast-facing areas are often ideal.
Protection from Wind:
While hibiscus enjoys sunlight, they can be susceptible to strong winds. Consider planting near a natural windbreak, such as a fence or taller plants, to shield them from gusts.
Soil Drainage:
Ensure the selected area has well-draining soil. Hibiscus dislikes waterlogged roots. If your soil is heavy or compacted, consider raised beds or amending the soil with organic matter.
Space:
Hibiscus can vary in size, so plan for adequate spacing between plants. Typically, they should be placed 2 to 3 feet apart.
Step 2: Preparing the Soil for Hibiscus Growth
Healthy soil is the foundation for robust hibiscus plants. Follow these steps to prepare the soil:
Soil Testing:
Consider conducting a soil test to determine its pH and nutrient levels. Hibiscus prefers slightly acidic soil with a pH between 6.0 and 6.5.
Soil Amendment:
Based on the soil test results, amend the soil as needed. Add organic matter like compost to improve fertility and drainage.
Soil Loosening:
Use a shovel or garden fork to loosen the soil to a depth of at least 12 inches. This will help the hibiscus roots penetrate easily.
Weed Removal:
Clear the area of any weeds or unwanted vegetation. Weeds can compete with hibiscus for nutrients and water.
Step 3: Gathering Necessary Tools and Materials
Before you begin planting, make sure you have the following tools and materials on hand:
Tools:
- Shovel or spade for digging
- Garden fork for soil preparation
- Pruning shears for trimming
- Hose or watering can for watering
- Rake for leveling the soil
Materials:
- Hibiscus plants or seeds
- Organic compost or well-rotted manure
- Mulch to retain soil moisture and suppress weeds
- Fertilizer suitable for hibiscus (slow-release granular fertilizer is a good option)
Planting and Caring for Hibiscus

To ensure your hibiscus plants thrive, it’s essential to understand the right planting procedures and subsequent care. In this guide, we’ll take you through each step, from planting to watering and fertilizing, to help you achieve the best results.
1. Planting Hibiscus
Ideal Planting Time
The ideal time to plant hibiscus is in the late spring to early summer when the weather is warm, and the risk of frost has passed. This allows the plants to establish themselves before winter.
Step-by-Step Planting Instructions
- Prepare the Soil: Start by ensuring the soil is well-draining, slightly acidic (pH 6.0-6.5), and enriched with organic matter. Use a shovel or spade to dig a hole that’s twice the diameter of the root ball and about as deep.
Read Also: What Can I Do With An Agriculture Degree?
- Remove the Plant from the Container: Gently remove the hibiscus plant from its container. If it’s root-bound (with roots circling the root ball), use your fingers to loosen the roots slightly.
- Planting Depth: Place the hibiscus in the center of the hole, making sure it sits at the same level as it did in the container. Avoid planting it too deep or too shallow.
- Backfill with Soil: Fill the hole with soil, patting it down gently to remove air pockets. Water the newly planted hibiscus thoroughly.
- Mulch: Apply a layer of mulch around the base of the plant to help retain moisture, regulate soil temperature, and suppress weeds. Keep the mulch away from the stem to prevent rot.
- Watering: Water the hibiscus immediately after planting and keep the soil consistently moist for the first few weeks as it establishes roots.
2. Spacing and Depth Requirements
- Spacing: Depending on the hibiscus variety, leave 2 to 3 feet of space between each plant to ensure they have enough room to grow and receive adequate sunlight.
- Depth: When planting, make sure the top of the root ball is level with the soil surface. Planting too deep can lead to root rot, while planting too shallow may expose the roots to harsh temperatures.
3. Watering and Fertilizing
Watering Needs
- Consistent Moisture: Hibiscus prefers consistently moist soil. Water deeply but less frequently to encourage deep root growth. Water the plant when the top inch of soil feels dry.
- Avoid Overwatering: Ensure good drainage to prevent waterlogged soil, which can lead to root rot. Well-draining soil is crucial.
Importance of Mulching
- Mulch Benefits: Mulching is essential for hibiscus. It helps retain soil moisture, regulates soil temperature, and prevents weeds from competing for nutrients.
- Mulch Application: Apply a 2-3 inch layer of organic mulch, such as wood chips or bark, around the base of the plant. Maintain a gap between the mulch and the stem to prevent rot.
Fertilization Schedule
- Spring Fertilization: Apply a balanced, slow-release fertilizer in early spring as new growth begins. Follow the package instructions for the recommended dosage.
- Monthly Feeding: During the growing season (spring through summer), feed your hibiscus with a high-phosphorus, water-soluble fertilizer every 4-6 weeks. Phosphorus promotes flowering.
- Reduced Fertilization: In late summer and fall, reduce fertilization to allow the plant to prepare for dormancy.
Pruning and Maintenance for Healthy Hibiscus Plants
Maintaining the health and vitality of your hibiscus plants involves more than just planting and watering. Pruning and regular maintenance are essential practices that contribute to robust growth, vibrant blooms, and an overall stunning appearance. In this guide, we’ll delve into the significance of pruning, provide step-by-step instructions for proper pruning, and offer valuable tips for the ongoing maintenance of your hibiscus plants.
Proper Pruning Techniques for Hibiscus
Follow these steps for proper pruning of your hibiscus plants:
1. Timing:
The best time to prune hibiscus is in late winter or early spring, just before new growth begins. This is when the plant is still dormant.
2. Tools:
Use sharp, clean pruning shears or loppers. Disinfect your tools with rubbing alcohol or a 10% bleach solution to prevent the spread of diseases.
3. Identify Dead or Diseased Branches:
Start by inspecting the plant for dead or diseased branches. These are often discolored, brittle, or visibly damaged. Remove them by cutting them back to healthy growth.
4. Remove Overgrown or Crossing Branches:
Look for branches that are overcrowding the center of the plant or crossing each other. Cut them back to a healthy outward-facing bud or branch junction.
5. Maintain Desired Shape:
If you want to maintain a particular shape or size for your hibiscus, prune accordingly. To encourage bushiness, pinch or cut back the tips of branches.
6. Thinning Out:
Periodically thin out the canopy of your hibiscus by removing some of the older branches entirely. This allows better air circulation and light penetration.
7. Prune Leggy Growth:
If your hibiscus becomes too tall or leggy, cut it back to a lower point to encourage a more compact form.
Tips for Maintaining Healthy Hibiscus
In addition to pruning, here are some general maintenance tips for healthy hibiscus plants:
1. Watering:
Maintain consistent moisture in the soil, but avoid waterlogged conditions. Water deeply when the top inch of soil feels dry.
2. Fertilizing:
Follow the fertilization schedule mentioned in previous sections, providing nutrients to support healthy growth and flowering.
3. Pest and Disease Control:
Regularly inspect your plants for signs of pests or diseases. Treat promptly if any issues arise.
4. Winter Protection:
In colder climates, protect your hibiscus from frost by moving potted plants indoors or providing frost protection for outdoor plants.
5. Monitoring Sunlight:
Ensure your hibiscus receives adequate sunlight, ideally 6 to 8 hours of direct sun daily.
Thanks for reading, we are sure that by going through this article, you should be able to grow your own hibiscus in your small farm or garden with ease..
Read Also: What Are The Benefits Of A Career In Agriculture?
