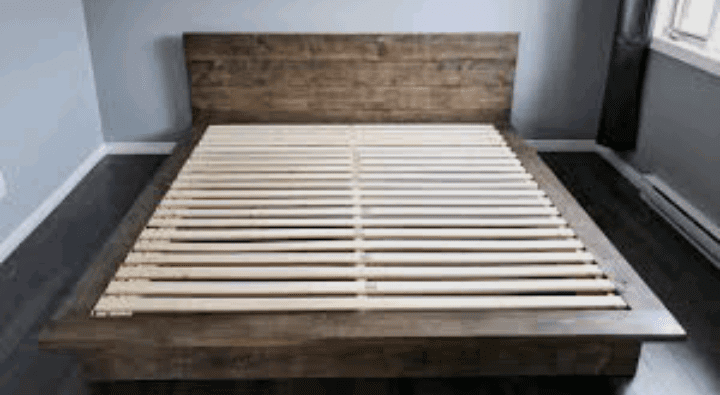
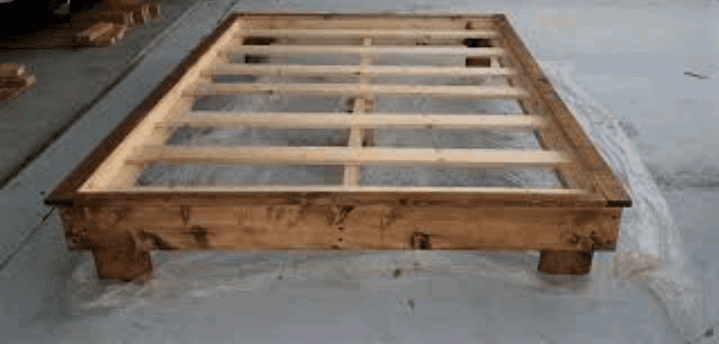
Embarking on the journey of creating your very own bed frame is not just about assembling pieces of wood or metal. It’s a venture into crafting comfort and style, where simplicity meets creativity. In the realm of DIY projects, a bed frame is a quintessential starting point for those looking to personalize their sleeping space.
Picture this: a bed frame that not only provides a sturdy foundation for your mattress but also reflects your unique taste and preferences. DIY bed frames offer more than just a practical solution; they’re a canvas for self-expression within the sanctuary of your bedroom.
In this article, we’ll guide you through the art of crafting a bed frame from scratch. From choosing the right materials and tools to exploring diverse designs and construction techniques, we’ll cover it all. Whether you’re a seasoned DIY enthusiast or a newcomer to the world of hands-on projects, our aim is to make the process accessible, enjoyable, and, most importantly, rewarding.
Discover the joy of measuring, cutting, and assembling as you transform basic materials into a personalized haven for rest and relaxation. Not only will you gain a functional piece of furniture, but you’ll also experience the satisfaction of bringing your vision to life.
So, grab your tools and let’s dive into the world of DIY bed frames, where simplicity and creativity intertwine to build not just a piece of furniture, but a haven for a good night’s sleep.
Read also: DIY: Tips for Becoming a Dreamcatcher Pro
DIY Bed Frame

1: Understanding the Importance of a Sturdy Bed Frame
A quality bed frame is more than just a piece of furniture; it is a crucial element in achieving a restful night’s sleep. A well-constructed bed frame provides support for the mattress, preventing sagging and ensuring proper spinal alignment. Moreover, a DIY bed frame allows you to customize the design, ensuring it complements your bedroom decor while meeting your specific comfort needs.
2: Choosing the Right Materials
Before going into the construction process, it’s essential to select the right materials for your DIY bed frame. The choice of materials can significantly impact the frame’s durability, aesthetics, and overall performance. Common materials include wood, metal, and a combination of both.
Wood offers a timeless and warm aesthetic, with options such as pine, oak, or maple. Each type of wood has unique characteristics, influencing the bed frame’s appearance and durability. Metal, on the other hand, provides a sleek and modern look, often favored for contemporary bedroom designs. Hybrid designs that incorporate both wood and metal elements can offer a blend of aesthetics and sturdiness.
3: Essential Tools for DIY Bed Frame Construction
Equipping yourself with the right tools is crucial for a successful DIY bed frame project. Depending on the complexity of your chosen design, you may need a variety of hand and power tools. Some essential tools include a saw (circular saw or miter saw for precision cuts), a power drill with various bits, screws, wood glue, a tape measure, and clamps to secure pieces during assembly.
Investing in quality tools will not only make the construction process smoother but also ensure the longevity of your bed frame. Consider borrowing or renting tools if you don’t own them, as this can be a cost-effective solution for a one-time project.
4: Design Considerations
One of the most exciting aspects of crafting your bed frame is the opportunity to tailor it to your preferences and style. Consider the overall design, taking into account factors such as the bed frame’s height, headboard and footboard styles, and any additional features like built-in storage.
For example, if your bedroom is on the smaller side, a bed frame with storage drawers underneath can maximize space. Alternatively, a minimalist platform bed frame may be ideal for a modern and clean aesthetic. Look for inspiration from online platforms, furniture stores, or even create a unique design that reflects your personality.
Read also: Check Out These Creative Wine Cork Crafts Ideas
Now, let’s walk through a general step-by-step guide for constructing a basic platform bed frame, a versatile and popular choice for DIY enthusiasts.
5: Step-by-Step Construction Guide
Step 1: Measure and Cut the Materials
- Measurements: Begin by measuring the dimensions of your mattress, considering any desired overhang. This will determine the size of your bed frame.
- Wood Cutting: Using a circular saw or miter saw, cut the wooden planks to the appropriate lengths based on your measurements. Ensure precise cuts for a snug fit during assembly.
Step 2: Assemble the Base
- Laying the Foundation: Lay out the cut pieces to form the base of the bed frame. This typically includes the longer side pieces (side rails) and shorter pieces (end rails).
- Secure with Screws: Use your power drill to attach the pieces together. Pre-drill holes to prevent wood splitting, and countersink the screws for a flush finish. Apply wood glue for added strength.
Step 3: Add Support
- Cross Supports: To prevent sagging, add additional support to the center of the frame. Install cross supports perpendicular to the side rails, spacing them evenly.
- Legs: If desired, attach legs to the corners of the frame for elevation. This step is optional, depending on your design preferences.
Step 4: Finishing Touches
- Sanding: Smooth any rough edges using sandpaper to create a polished finish. This step is crucial, especially if you plan to stain or paint the bed frame.
- Staining or Painting: Apply a finish that suits your bedroom decor. Staining enhances the natural beauty of the wood, while painting allows for creative expression.
Step 5: Assembly
- Assemble in the Bedroom: Move the finished bed frame to the bedroom and assemble it in place. This is especially important if the bed frame is large and may not fit through doorways when fully assembled.
- Attach the Mattress Support: If your bed frame design includes slats for mattress support, install them at this stage. Ensure they are evenly spaced for optimal support.
Step 6: Finishing Touches
- Attach Headboard and Footboard: If your design includes a headboard and footboard, attach them securely to the bed frame. This step may involve additional cutting and assembly.
- Secure all Joints: Double-check that all screws are tightened, and joints are secure. This ensures the bed frame’s stability and longevity.
Step 7: Enjoy Your Handcrafted Bed Frame
Congratulations! You’ve successfully crafted your DIY bed frame. Now, adorn it with your favorite bedding, pillows, and throws to create a cozy and inviting sleep sanctuary.
6: Troubleshooting and Maintenance
Even with careful construction, occasional issues may arise with your DIY bed frame. Common problems include squeaks, loose joints, or creaking. Regular maintenance, such as tightening screws and inspecting for wear, can address these issues promptly. Additionally, consider applying furniture wax or silicone spray to reduce friction between moving parts.
7: Inspirational DIY Bed Frame Designs
To further fuel your creativity, let’s explore a few unique DIY bed frame designs that showcase the versatility of this hands-on project.
Design 1: Floating Platform Bed
Create the illusion of a floating bed by incorporating hidden legs or a wall-mounted design. This modern and space-saving option adds a touch of sophistication to your bedroom.
Design 2: Reclaimed Wood Pallet Bed
For an eco-friendly and rustic aesthetic, repurpose old wooden pallets into a stylish bed frame. Sand and finish the pallets for a polished look that exudes character.
Design 3: Storage Bed with Drawers
Maximize bedroom space by integrating storage drawers into your bed frame. These built-in drawers provide a convenient solution for stowing away extra linens, clothing, or personal items.
Design 4: Canopy Bed Frame
Add a touch of luxury to your bedroom by constructing a canopy bed frame. Use curtain rods or wooden beams to create a canopy, transforming your bed into a cozy retreat.
Read also: The Art of Waste to Jewelry Business
