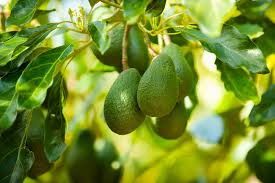
Avocado tree which produces Avocado fruits or Avocado Pear as popularly called is without a doubt one of the lucrative Agricultural fruits that a crop farmer can make money from through the sales of the Avocado fruits.
Their are two major ways that the Avocado tree can be produced and they include: 1) The Avocado trees can be produced through seed or 2) Through grafting branches from an existing Avocado plant.
Today, we are going to carry you through the step by step guide on the grafting process of an Avocado plant.
Meanwhile the generating of an Avocado plant through the seed only entails planting an Avocado seed which is usually found in the middle of an Avocado fruit on the ground and allow it germinate into an Avocado seedling.
Avocado trees grown from a seed from a grocery store avocado may produce a tree if you plant it, but its fruit may be different or even inedible, due to the fact that the tree grown from seed will be genetically different than the original tree that produced the fruit.
The new tree will, however, be a good base for grafting branches from an existing avocado tree that’s producing reliable fruit. Once you’ve grown your seedling to a height of about three feet, it’s time to start grafting fruit-bearing branches onto it in a process called topworking. Begin grafting in the spring when bark slips easily from the inner wood of the tree.
Read Also: Anatomy of Fishes: Female Fish and their Reproductive Strategies
Steps involve with Grafting Avocado Tree
Step 1
Select budwood from a healthy, productive avocado tree. The best buds are located near the ends of branches that are 1/4 to 1 inch in diameter.
Step 2
Cut 6-inch lengths of healthy branch tips that each contain several buds, using a sharp knife. Take six to eight cuttings, wrap them in damp paper towels, and lay them in a bowl of ice to keep them cold and moist.
Step 3
Make a T-shaped cut on a branch of the rootstock tree, about 12 inches from the trunk. The long part of the T should be about 1 inch long. Make a shorter, crossing cut that goes 1/3 of the way through the branch. Twist the knife slightly to pry the bark away from where the two cuts meet.
Step 4
Examine the bud sticks you cut and placed in the bowl. Choose a healthy bud, and cut it from the stick, beginning 1/2 inch below the bud and ending 3/4 inch beyond it.
Read Also: The Ultimate Step-by-Step Guide to Vegetable Gardening
Step 5
Bring the selected bud back to the rootstock. Slide the long end of the budwood into the long part of the T-shaped cut, matching the bud to the horizontal cut in the T.
Step 6
Wrap the budded graft with a rubber band, securing it above and below, but not actually on the bud. Repeat steps 3 to 5 in different areas of the tree until you’ve used buds from all the bud sticks.
Step 7
Remove the rubber bands when the bud unions have healed and buds begin to open, which should be within three to four weeks. As these new branches grow and mature, avocado fruit will be produced on them.
You can find special grafting rubber bands at an agricultural supply store in your area. If there isn’t one, an everyday rubber band will do.
Don’t let the bud sticks or T-cuts dry out during the grafting process. Make a single cut and complete the graft before moving on to next.
Now that you have learnt how to graft an Avocado tree to produce an Avocado tree, why don’t you practically carryout the process and let us hear your observations and results using the comment section below?
And if you need more assistance or clarifications, kindly chat with us or reach us through our email as we will be glad to assist you further.
You are also encouraged to share this post with your loved ones you feel the information might help if found useful enough as we cannot reach everyone at the same time.
Reference
