Looking to infuse a breath of fresh air into your living space? Look no further than the charming world of DIY plant stands. In the hustle and bustle of modern life, bringing a bit of nature indoors is a trend that’s not just aesthetically pleasing but also therapeutic. A DIY plant stand is your ticket to creating a stylish, personalized haven for your beloved green companions.
Whether you’re a seasoned crafter or a novice with a passion for plants, this guide is designed to make the process simple, enjoyable, and rewarding. A DIY plant stand is more than just a functional piece; it’s an expression of your style and a nod to the beauty of natural elements within your home.
Imagine having a customized wooden stand, carefully crafted to complement your living room, or a sleek metal creation adding an urban touch to your space. The possibilities are as diverse as your plant preferences. This article will take you on a journey through the basics of DIY plant stands, from choosing the right materials and tools to exploring creative designs that suit your taste.
So, whether you’re yearning for a minimalist mid-century stand or envisioning a hanging macramé creation, this guide will equip you with the knowledge and inspiration to bring your vision to life.
Get ready to roll up your sleeves, breathe life into your plants, and watch your living space transform into a green oasis of your own making. It’s time to elevate your greenery with a touch of creativity and a DIY plant stand as the centerpiece of your indoor garden. Let’s get started!
Read also: How to Make a Potholder
DIY Plant Stand

Understanding the Basics
Before going into the creative process, it’s crucial to grasp the fundamentals of plant stands. A plant stand serves both functional and decorative purposes, providing an elevated platform for your plants while enhancing the overall visual appeal of your space.
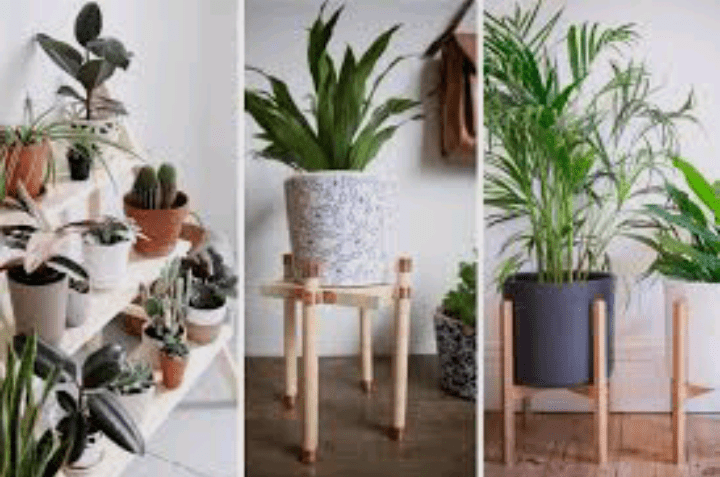
There are various types of plant stands, including pedestal stands, tiered stands, hanging stands, and wall-mounted stands. Each type caters to different plant varieties and room configurations.
Materials and Tools
The first step in any DIY project is gathering the necessary materials and tools. The beauty of crafting your plant stand lies in the freedom to choose materials that match your style and complement your home decor. Common materials for DIY plant stands include wood, metal, PVC pipes, and even recycled materials like pallets or old furniture.
For a classic and rustic look, consider using reclaimed wood. This not only adds character to your stand but also promotes sustainability. If you prefer a more modern aesthetic, sleek metal stands can be easily customized to fit your design preferences. PVC pipes are an affordable and versatile option, allowing you to create stands of various shapes and sizes.
Basic tools such as a saw, drill, sandpaper, and screws are essential for most DIY plant stand projects. However, the specific tools you’ll need depend on the complexity of your chosen design.
Design Inspiration
Once you’ve gathered your materials and tools, it’s time to draw inspiration for your DIY plant stand. The design possibilities are virtually limitless, catering to every taste and skill level. Here are a few design ideas to spark your creativity:
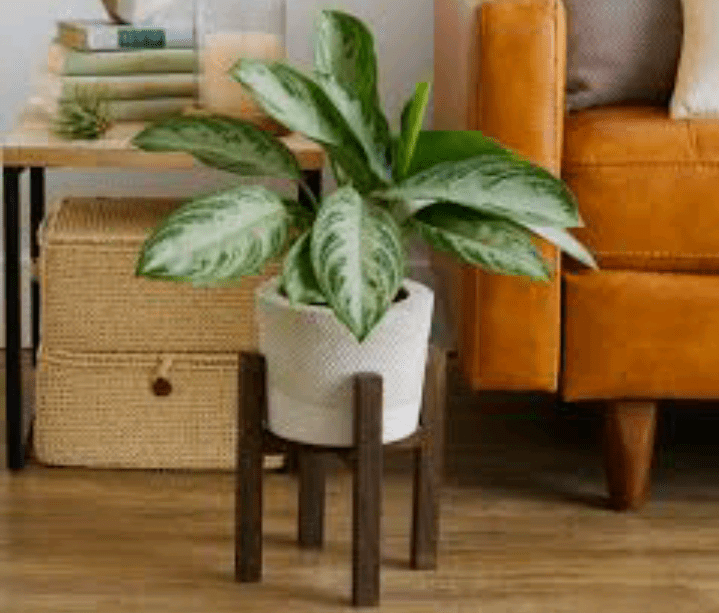
Minimalist Mid-Century Stand: Combine the timeless elegance of mid-century design with the simplicity of a minimalist aesthetic. Use tapered wooden legs and a clean, geometric shape for a stand that complements both modern and classic interiors.
Hanging Macramé Plant Stand: Embrace the bohemian spirit by crafting a hanging macramé plant stand. This DIY project adds a touch of whimsy to your space and is an excellent solution for homes with limited floor space.
Multi-Tiered Plant Pyramid: For the plant enthusiast with a growing collection, a multi-tiered pyramid stand provides ample space for an assortment of greenery. Customize the size and number of tiers to fit your specific needs.
Industrial Pipe Stand: Channel an industrial vibe by using metal pipes to create a sturdy and stylish plant stand. This design is not only robust but also adds an edgy, urban feel to your indoor garden.
Repurposed Furniture Stand: Give new life to old furniture by repurposing it into a unique plant stand. From ladders to wooden crates, the possibilities are endless. This sustainable approach not only reduces waste but also adds a touch of vintage charm to your home.
Read also: Importance of Good Personal Hygiene
Step-by-Step Construction
With your design in mind, it’s time to roll up your sleeves and start building. Remember to take safety precautions, such as wearing protective gear and working in a well-ventilated area. Here’s a general step-by-step guide to constructing a simple wooden plant stand:
Step 1: Measure and Cut Your Materials
Begin by measuring and marking the dimensions of your plant stand on the chosen material. Use a saw to carefully cut the pieces according to your measurements. Ensure precision, as accurate cuts are crucial for the stability and aesthetics of your stand.
Step 2: Sand and Smooth the Edges
After cutting, use sandpaper to smooth any rough edges. This step not only enhances the visual appeal of your plant stand but also reduces the risk of splinters. Pay attention to corners and joints, ensuring a seamless finish.
Step 3: Assemble the Base
If your design includes a base, start by assembling it. Use wood glue for a strong bond and reinforce it with screws for added stability. Pay attention to the angles and measurements to ensure a level base.
Step 4: Attach Legs or Supports
Attach the legs or supports to the base, again using a combination of wood glue and screws. Ensure that the legs are evenly spaced and securely fastened to prevent wobbling. Use a level to confirm that the plant stand is stable and balanced.
Step 5: Add Additional Features
Depending on your design, add any additional features such as shelves, hooks, or decorative elements. This is where your creativity can truly shine. Experiment with different configurations until you achieve the desired look and functionality.
Step 6: Finishing Touches
Apply a finish to your plant stand to protect the wood and enhance its appearance. Options include paint, stain, or a clear sealant. Choose a finish that complements your interior style and provides durability, especially if the plant stand will be placed outdoors.
Tips and Tricks for Success
While constructing your DIY plant stand, keep these tips in mind to ensure a successful and enjoyable crafting experience:
Select the Right Materials: Choose materials that suit your design and align with your aesthetic preferences. Consider factors such as durability, weight capacity, and resistance to moisture, especially if the plant stand will be placed outdoors.
Precision is Key: Accurate measurements and precise cuts are essential for a sturdy and visually appealing plant stand. Take your time at this stage to avoid mistakes that could affect the final result.
Experiment with Finishes: The finish you choose can significantly impact the overall look of your plant stand. Experiment with different finishes on scrap pieces of wood to find the one that best complements your home decor.
Consider Plant Needs: Different plants have different requirements. Some thrive in direct sunlight, while others prefer shade. Keep these factors in mind when deciding on the placement of your plant stand in your home.
Personalize with Pottery and Décor: Elevate the visual appeal of your DIY plant stand by choosing stylish pots and incorporating decorative elements. Consider using pottery, stones, or even fairy lights to add a personalized touch.
Regular Maintenance: Once your plant stand is in place, don’t forget about regular maintenance. Water your plants according to their needs, and periodically check the stability of the stand to address any issues promptly.
Showcasing Your Green Creations
Now that your DIY plant stand is complete, it’s time to showcase your green creations. Consider the following ideas for displaying your plant stand in different areas of your home:
Living Room Focal Point: Place a statement plant stand in the corner of your living room to create a focal point. This draws attention to the vibrant greenery and adds a touch of nature to your main gathering space.
Kitchen Herb Garden: Craft a small, tiered plant stand for your kitchen to house a collection of fresh herbs. Not only does this add a practical element to your cooking space, but it also infuses the room with delightful scents.
Bedroom Oasis: Bring tranquility to your bedroom by incorporating a modest plant stand with calming greenery. Choose plants known for their air-purifying qualities to enhance the quality of your sleep.
Balcony Retreat: If you have a balcony or outdoor space, create a plant oasis with a combination of DIY stands. This transforms your balcony into a private retreat, perfect for enjoying a cup of coffee surrounded by nature.
Entrance Welcoming Stand: Impress guests right from the entrance by placing a stylish plant stand in the foyer. This not only adds a welcoming touch but also sets the tone for the rest of your home.
Troubleshooting Common Issues
Even the most carefully crafted plant stands can encounter issues. Here are some common problems and how to address them:
Wobbling or Instability: If your plant stand wobbles, check that all legs or supports are securely fastened. Adjust the length of the legs if necessary, and ensure the stand is on a level surface.
Wood Warping or Cracking: Wood can react to changes in temperature and humidity. Minimize these effects by choosing a suitable wood type, applying a protective finish, and avoiding extreme conditions.
Water Damage: Protect your plant stand from water damage by using waterproof finishes or sealants. Consider using trays under potted plants to catch excess water.
Pests and Mold: Regularly inspect your plants for pests and mold. Keep the area around the plant stand clean and well-ventilated to discourage infestations.
Fading Finish: If the finish on your plant stand begins to fade, consider reapplying it. Before doing so, sand the surface lightly to ensure proper adhesion.
Read also: Waste Resource Recovery Techniques
