DIY Bath Bombs: Elevate Your Bathtime Bliss
Are you ready to turn your ordinary bath into a bubbling, fragrant oasis of relaxation? Look no further than the world of DIY bath bombs! If you’ve ever wondered about the secret behind those fizzy wonders that transform bathwater into a spa-like experience, you’re in for a treat.
In this simple yet comprehensive guide, we’ll walk you through the art of crafting your own bath bombs, ensuring that your self-care routine gets a delightful upgrade.
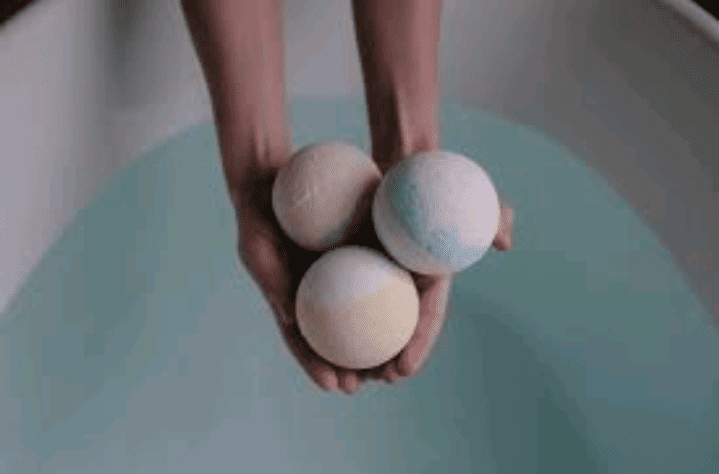
Bath bombs have taken the self-care world by storm, offering a burst of color, fragrance, and effervescence to your bathing ritual. The best part? You don’t need to be a chemist or spend a fortune to enjoy these little balls of bliss. With a handful of readily available ingredients and a dash of creativity, you can whip up personalized bath bombs that cater to your unique preferences.
From the basics of baking soda and citric acid to the aromatic allure of essential oils, we’ll break down each component in a way that’s easy to understand. No need for complicated jargon or fancy equipment – just a willingness to embark on a journey of crafting, relaxation, and perhaps a splash of whimsy.
So, grab your mixing bowls and molds, and let’s go into the world of DIY bath bombs. Get ready to discover the joy of creating your own fizzy, fragrant masterpieces, bringing a touch of luxury to your bathtime routine. Let the soothing scents and vibrant colors transport you to a realm of tranquility – all courtesy of your newfound bath bomb-making prowess!
Read also: DIY Pest Control: A Step-by-Step Guide
DIY Bath Bombs

I. Understanding the Basics: Ingredients
Before we embark on our bath bomb-making journey, it’s crucial to familiarize ourselves with the basic ingredients. The primary components are baking soda, citric acid, and Epsom salt, which work together to create that delightful fizzing effect. These ingredients are not only easily available but also safe for your skin.
- Baking Soda (Sodium Bicarbonate): Baking soda is the backbone of any bath bomb recipe. It not only provides the fizz but also helps to soften the water, leaving your skin feeling silky smooth. Make sure to choose a high-quality baking soda for the best results.
- Citric Acid: Citric acid is the yin to baking soda’s yang. When combined, these two ingredients create the chemical reaction responsible for the fizzing sensation. You can find citric acid in the baking aisle of most grocery stores or online.
- Epsom Salt: Epsom salt, or magnesium sulfate, adds a therapeutic touch to your bath. It helps soothe sore muscles and promotes relaxation. Feel free to experiment with different varieties of Epsom salt, such as lavender-scented or eucalyptus-infused, to customize your bath bomb.
- Cornstarch: Cornstarch is often included to give the bath bomb a smooth texture and prevent clumping. It also helps bind the ingredients together, ensuring your bath bomb holds its shape.
- Essential Oils: Elevate your bath bomb experience by incorporating essential oils. Choose scents that resonate with you, whether it’s the calming lavender, the invigorating eucalyptus, or the sweet citrus notes of orange. Remember, a few drops go a long way.
- Colorants: While optional, colorants add a visually appealing element to your bath bombs. You can use natural options like beetroot powder or spirulina for a subtle hue, or experiment with cosmetic-grade colorants for a vibrant burst of color.
- Water or Witch Hazel: Liquid is needed to bind the dry ingredients together. You can use plain water, but many DIY enthusiasts swear by witch hazel for its additional skin-soothing properties.
II. Tools of the Trade
Now that we have our ingredients in order, let’s gather the tools required for a seamless bath bomb-making process:
- Mixing Bowls: Invest in a set of mixing bowls, preferably stainless steel or glass, for easy cleaning and durability.
- Whisk or Spoon: A whisk or spoon will help you evenly distribute the ingredients and eliminate any clumps.
- Molds: Bath bomb molds come in various shapes and sizes. Choose molds that reflect your personal style, whether it’s classic spheres, hearts, or intricate geometric patterns.
- Spray Bottle: If you opt for witch hazel as your binding agent, a spray bottle makes it easy to control the amount of liquid you’re adding to the mixture.
- Gloves: While not mandatory, gloves can protect your hands from potential skin irritation caused by concentrated essential oils or colorants.
- Parchment Paper or Silicone Mat: To prevent your bath bombs from sticking to surfaces, lay down parchment paper or a silicone mat before starting the crafting process.
Read also: Crafting Your Ideal Workspace: A Comprehensive Guide to Building Your DIY Desk
III. Step-by-Step Guide: Crafting Your DIY Bath Bomb
Now that we’ve got our ingredients and tools in place, let’s dive into the step-by-step process of making your own bath bombs:
Step 1: Prepare Your Workspace
Set up your workspace by laying down parchment paper or a silicone mat. This will make the cleaning process much easier and prevent any mishaps.
Step 2: Measure and Mix Dry Ingredients
In a mixing bowl, combine 1 cup of baking soda, 1/2 cup of citric acid, 1/2 cup of Epsom salt, and 1/2 cup of cornstarch. Use a whisk or spoon to ensure an even distribution of the dry ingredients.
Step 3: Add Color and Scent
This is where the fun begins! Add a few drops of your chosen essential oil and colorant to the dry mixture. Start with a small amount and adjust until you achieve the desired scent and color. Remember, it’s easier to add more than to correct an overly scented or colored mixture.
Step 4: Gradually Add Liquid
Whether you’re using water or witch hazel, the key is to add it gradually. If you’re using a spray bottle, give the mixture a few spritzes and then mix. The goal is to achieve a consistency similar to damp sand that holds its shape when squeezed.
Step 5: Pack the Mixture into Molds
Take small handfuls of the mixture and press them into your chosen molds. Be sure to pack the mixture tightly to ensure the bath bomb holds its shape. If you’re using intricate molds, consider using a spoon to help with the packing process.
Step 6: Let Them Set
Once the molds are filled, allow the bath bombs to set for at least 24 hours. This ensures that they fully harden and hold their shape when removed from the molds.
Step 7: Unmold and Enjoy
Carefully remove the bath bombs from the molds, and voila – your DIY bath bombs are ready for action! Store them in an airtight container to preserve their freshness.
IV. Advanced Techniques: Layered and Fizzy Surprises
For those looking to take their bath bomb game to the next level, let’s explore two advanced techniques: layered bath bombs and hidden surprises.
Layered Bath Bombs: To create a layered effect, divide your mixture into separate bowls and add different colorants to each portion. Pack the layers one at a time, allowing each to set before adding the next. The result? A visually stunning bath bomb that releases a cascade of colors as it fizzes.
Hidden Surprises: Elevate the bathing experience by adding a surprise element to your bath bombs. Consider placing a small toy, dried flowers, or even a pinch of biodegradable glitter in the center of your mold before packing in the mixture. As the bath bomb dissolves, the hidden treasure is revealed, adding an extra touch of excitement.
V. Troubleshooting Common Issues
Even seasoned bath bomb makers encounter challenges from time to time. Here are solutions to common issues:
- Cracking: If your bath bombs are cracking, the mixture may be too dry. Try adding a bit more liquid and packing the mixture more firmly.
- Flat Bath Bombs: Flat bath bombs usually result from not packing the mixture tightly enough into the molds. Use a spoon or your hands to press the mixture firmly.
- Fragile Bath Bombs: Fragile bath bombs may indicate that the mixture is too wet. To remedy this, add more dry ingredients until the mixture has a consistency similar to damp sand.
Read also: Environmental Management Laws and Regulations


