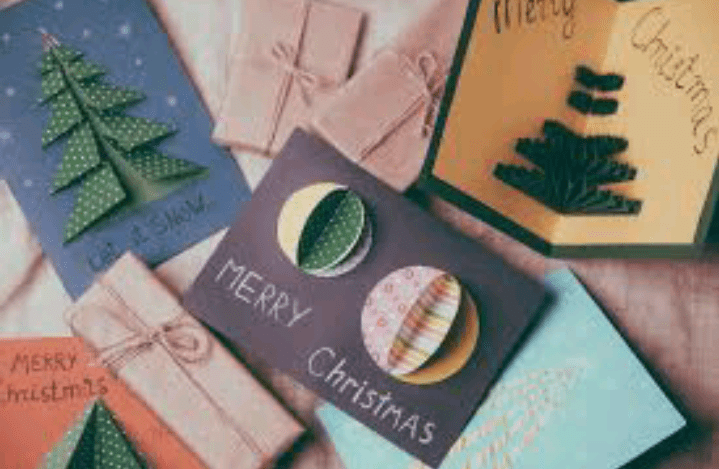
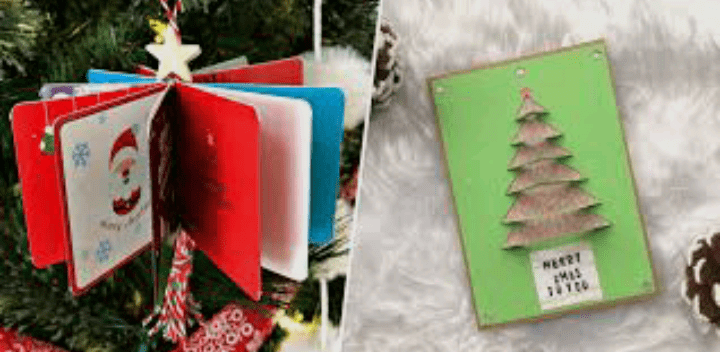
DIY Christmas cards are not just pieces of paper; they’re personalized expressions of holiday cheer, crafted with love and creativity. In this article, we’ll delve into the delightful world of creating your own Christmas cards, providing you with the inspiration and know-how to make this holiday season extra special.
As we navigate the festive landscape of DIY Christmas cards, it’s essential to understand that each card is a unique reflection of the sender’s sentiments. Whether you’re a seasoned crafter or someone picking up scissors and glue for the first time, the joy of creating something special for your loved ones is at the heart of this endeavor.
In the following pages, we’ll explore the essential materials you’ll need, from sturdy cardstock to vibrant decorative paper. We’ll discuss various themes and design ideas, helping you choose the perfect aesthetic to convey your holiday spirit. Additionally, we’ll walk you through step-by-step tutorials, providing simple yet effective techniques to bring your creative visions to life.
Christmas is a time for connection, and what better way to connect than by sending a piece of your heart through a handcrafted card? Whether you choose a classic red-and-green theme, a winter wonderland motif, or something entirely unique, the goal is to spread joy and warmth to those who receive your personalized creations.
So, let’s embark on this festive journey together, armed with scissors, glue, and a sprinkle of holiday magic. Get ready to infuse your DIY Christmas cards with creativity and love, making this holiday season one to remember for both you and your recipients.
Read also: Photos: Remember The Man Who Trekked From Lagos To Abuja in 2015, See What Happened to Him!
DIY Christmas Cards

1. Getting Started: Essential Materials
Before going into the world of DIY Christmas cards, gather your materials. A trip to your local craft store or a browse through online marketplaces will reveal a plethora of options. Here’s a basic list to get you started:
Cardstock or Blank Cards: The foundation of your card. Opt for sturdy cardstock or ready-made blank cards as the canvas for your creative expression.
Decorative Paper: Choose festive, patterned paper to add flair and color to your cards. This can be used for backgrounds, borders, or as accents.
Scissors and Paper Cutter: Essential tools for precise cutting. Scissors are great for intricate details, while a paper cutter ensures clean, straight lines.
Glue and Adhesives: A good quality glue stick, double-sided tape, or glue dots will help secure your embellishments.
Markers, Pens, and Pencils: For adding personal messages, doodles, or details to your cards.
Stamps and Ink Pads: If you’re feeling adventurous, use stamps to create uniform patterns or images on your cards.
Embellishments: Think buttons, ribbons, stickers, sequins, and any other small decorations that suit your theme.
Envelopes: Ensure your DIY creations have a proper home. Choose envelopes that complement the size of your cards.
2. Themes and Design Ideas
Now that you have your materials, it’s time to decide on the theme for your DIY Christmas cards. Themes can add a cohesive and festive touch to your creations. Consider the following ideas:
Classic Red and Green: Embrace the traditional Christmas colors for a timeless and elegant look.
Winter Wonderland: Use shades of blue and white to create a serene, snowy scene on your cards.
Rustic Charm: Incorporate natural elements like twine, burlap, and pinecones for a cozy, rustic feel.
Minimalistic Modern: Opt for a clean and simple design with neutral colors and sleek lines.
Cultural Celebration: Infuse your cards with elements from your cultural or religious traditions for a personalized touch.
3. Card Making Techniques
With your materials and theme in mind, let’s explore some popular card-making techniques to bring your creative visions to life.
Layering: Experiment with layering different papers to create depth and dimension. This technique is especially effective for adding interest to simple designs.
Cut-Outs and Die-Cutting: Use scissors or a die-cutting machine to create intricate shapes and patterns. This adds a professional touch to your cards.
Embossing: Elevate your cards by embossing designs onto the cardstock. This technique creates a raised, textured effect that adds a touch of luxury.
Decoupage: Combine cut-out images or patterns with layers of glue to create a 3D effect. This technique works well for creating thematic scenes.
Quilling: Roll thin strips of paper into coils and shape them into various designs. Quilling adds a delicate and ornate touch to your cards.
Watercolor and Ink Wash: Unleash your inner artist by using watercolors or ink washes to create beautiful backgrounds or focal points on your cards.
Read also: Crafting Your Own Culinary Magic: The Art and Science of DIY Taco Seasoning
4. Step-by-Step DIY Christmas Card Tutorial
Now, let’s walk through a step-by-step tutorial for creating a charming DIY Christmas card using the layering technique and festive embellishments.
Materials Needed:
- Blank card or cardstock
- Decorative paper with a holiday theme
- Scissors
- Glue stick
- Markers or pens
- Ribbon or twine
- Small festive embellishments (e.g., buttons, stickers, sequins)
Step 1: Choose Your Design
Begin by selecting a design for your card. This could be a classic Christmas tree, a snowman, or any other festive motif. Keep it simple if you’re a beginner or challenge yourself with a more intricate design.
Step 2: Cut and Layer
Cut the decorative paper to fit the front of your card. If you’re feeling adventurous, cut out smaller shapes or images to layer on top. Experiment with different arrangements until you find a layout that pleases you.
Step 3: Adhere the Layers
Using a glue stick, adhere the decorative paper and any additional layers to the front of the card. Press down firmly to ensure a secure bond.
Step 4: Add Personal Touches
Use markers or pens to add a personal message or doodles. This is where you can let your creativity shine. Consider adding details like snowflakes, stars, or holiday greetings.
Step 5: Embellish with Ribbon or Twine
Wrap a small piece of ribbon or twine around the card and tie it into a bow. This adds a tactile and visually appealing element to your creation.
Step 6: Attach Festive Embellishments
Enhance your card with festive embellishments such as buttons, stickers, or sequins. These small details can turn a simple card into a true work of art.
Step 7: Final Touches
Review your card and make any final adjustments. Ensure all elements are securely attached and that the card looks balanced and aesthetically pleasing.
Step 8: Inside Message
Don’t forget to add a heartfelt message inside the card. Whether it’s a warm wish, a poem, or a simple “Merry Christmas,” the inside is just as important as the outside.
5. Tips and Tricks for Success
Experiment with Color Combinations: Don’t be afraid to try unconventional color combinations. Gold and navy, silver and blush, or even black and white can create stunning and unique results.
Incorporate Texture: Add texture to your cards by using materials like felt, fabric, or even sandpaper for a tactile experience.
Personalize for Recipients: Consider the preferences and interests of the person receiving the card. Incorporate elements that reflect their hobbies or favorite colors for a thoughtful touch.
Create a Card-Making Station: Set up a dedicated space with all your materials organized for easy access. This makes the creative process more enjoyable and efficient.
Practice Mindfulness: Crafting can be a therapeutic activity. Put on some festive music, light a candle, and immerse yourself in the joy of creating.
