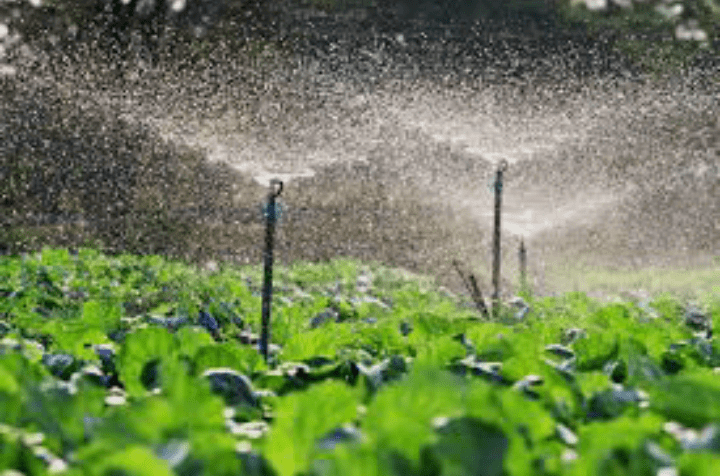
In the pursuit of a vibrant and healthy lawn, a DIY sprinkler system emerges as a beacon of affordability and ingenuity. Imagine lush greenery, thriving plants, and the joy of creating a flourishing oasis right in your backyard—all made possible through the simplicity of a do-it-yourself approach.
Whether you’re a seasoned DIY enthusiast or a novice gardener, this guide is your roadmap to a cost-effective and customized irrigation solution.
A DIY sprinkler system isn’t just a practical endeavor; it’s a journey of empowerment. Taking control of your lawn’s hydration needs becomes not only feasible but also remarkably satisfying. No need to break the bank with professional installations—this is your opportunity to tailor a watering system precisely to the layout and needs of your outdoor space.
In the following pages, we will explore the various facets of DIY sprinkler systems with a user-friendly approach. From the planning stages, where we consider the unique characteristics of your lawn, to the selection of components that suit your specific requirements, each step is designed to be accessible and straightforward.
So, whether you’re seeking to save on installation costs, customize your watering routine, or simply relish the joy of creating something with your own hands, this guide is your companion. Embrace the simplicity of DIY and let’s embark on a journey to turn your lawn into a lush haven—one sprinkler at a time.
Read also: How to Make a Friendship Bracelets at Home
DIY Sprinkler System

I. Benefits of DIY Sprinkler Systems
- Cost-Effectiveness: Perhaps the most enticing aspect of a DIY sprinkler system is the cost savings. Hiring a professional can be expensive, involving labor costs and premium equipment expenses. By taking the reins yourself, you can significantly cut down on these expenditures.
- Customization: DIY projects allow for a high degree of customization. You have the freedom to design a system that perfectly suits the layout of your lawn and the specific needs of your plants. This flexibility is often not as easily achievable with pre-packaged professional installations.
- Personal Satisfaction: There’s a unique sense of accomplishment that comes with creating something with your own hands. Installing a sprinkler system on your own not only saves money but also provides a fulfilling experience and a lasting sense of pride in your outdoor space.
II. Planning Your DIY Sprinkler System
Before diving into the installation process, careful planning is essential. This phase involves assessing your lawn’s needs, understanding water pressure, and mapping out the irrigation zones.
- Lawn Assessment:Begin by evaluating the size and shape of your lawn. Note any irregularities, such as slopes, flower beds, or trees, as these will impact the design of your sprinkler system.
- Water Pressure and Flow:Check the water pressure and flow rate of your outdoor faucet. This information is crucial for determining the number of sprinklers each zone can support. You can measure this using a water pressure gauge, readily available at most hardware stores.
- Mapping Zones:Divide your lawn into irrigation zones based on water needs. For example, areas with sun-loving plants might require more water than shaded regions. Mapping out these zones will guide the placement and configuration of your sprinkler heads.
III. Choosing the Right Components
Selecting the right components is a pivotal step in ensuring the success of your DIY sprinkler system. Here’s a breakdown of key elements:
- Sprinkler Heads:There are various types of sprinkler heads, each serving a specific purpose. Pop-up heads are ideal for lawns, while drip irrigation is more suitable for flower beds. Consider the precipitation rate of the heads to ensure even water distribution.
- Pipes and Fittings:High-quality PVC pipes and fittings are the backbone of your system. Ensure that they are durable and resistant to weather conditions. Carefully measure and cut the pipes to fit the layout of your lawn.
- Controller:The controller is the brain of your sprinkler system, allowing you to set watering schedules and durations. Opt for a controller that is user-friendly and has the capacity to handle the number of zones in your setup.
Read also: DIY Studio Space Decor Ideas
IV. Installation Steps
Now that you’ve planned and gathered your components, it’s time to roll up your sleeves and get into the installation process.
- Marking and Excavation:Using spray paint or flags, mark the locations for your sprinkler heads based on your zone mapping. Begin excavating the marked areas, making sure to dig trenches for the pipes.
- Laying Pipes and Fittings:Carefully lay out the PVC pipes according to your design, connecting them with the appropriate fittings. It’s crucial to create a well-supported and level system to ensure proper water flow.
- Installing Sprinkler Heads:Attach the chosen sprinkler heads to the pipes, ensuring they are level with the ground. Pop-up heads should be set at the correct height to allow for efficient watering without obstruction.
- Connecting to the Water Source:Connect the main line to the outdoor faucet using a backflow preventer to protect your water supply. Install a valve manifold to control the flow to different zones.
- Controller Setup:Mount the controller in a convenient location, usually near an electrical outlet. Follow the manufacturer’s instructions to program watering schedules and durations for each zone.
- Testing and Adjusting:Before covering the trenches, run a test cycle to check for leaks and ensure the proper functioning of each sprinkler head. Make any necessary adjustments to the direction and range of the heads for optimal coverage.
V. Maintenance Tips for Longevity
Congratulations on successfully installing your DIY sprinkler system! To ensure its longevity and efficiency, consider the following maintenance tips:
- Regular Inspections:Periodically inspect your system for leaks, clogs, or damaged components. Catching and addressing issues early can prevent more extensive damage and ensure uninterrupted watering.
- Seasonal Adjustments:Modify your watering schedule based on seasonal changes. Lawns generally require more water in the hot summer months and less during the cooler seasons.
- Cleaning Sprinkler Heads:Keep sprinkler heads clean from debris and sediment. Regularly remove any dirt or grass clippings that may accumulate, affecting the spray pattern.
- Winterization:If you live in an area with freezing temperatures, it’s essential to winterize your sprinkler system. This involves draining the water from the pipes to prevent freezing and potential damage.
- Upgrades and Expansion:As your landscaping evolves, consider upgrading or expanding your system. Adding new zones or updating components can accommodate changes in your lawn’s layout or the addition of new plants.
Read also: Environmental Management for Homes
