Creating an online course website is one of the most effective ways to share knowledge, build authority, and generate income in today’s digital world. Whether you are a teacher, coach, entrepreneur, or professional with valuable expertise, an online course website allows you to reach learners globally without the limitations of physical classrooms.
This guide explains the entire process step by step, from planning your course idea to launching and managing a professional online course website. It is written for beginners but goes deep enough to help you avoid common mistakes and build a platform that can scale over time.
Read Also: Poultry Farming: One of the Most Profitable Agribusinesses in the World
Understanding What an Online Course Website Is
An online course website is a platform where learners can enroll in courses, access structured lessons, watch videos, download materials, and track their progress. Unlike simple blogs or video channels, course websites are designed around learning experiences.
A typical course website includes:
- Course landing pages
- Video or text-based lessons
- Student dashboards
- Payment and enrollment systems
- Progress tracking and certificates (optional)
The goal is not just to share information, but to guide students through a clear learning journey.
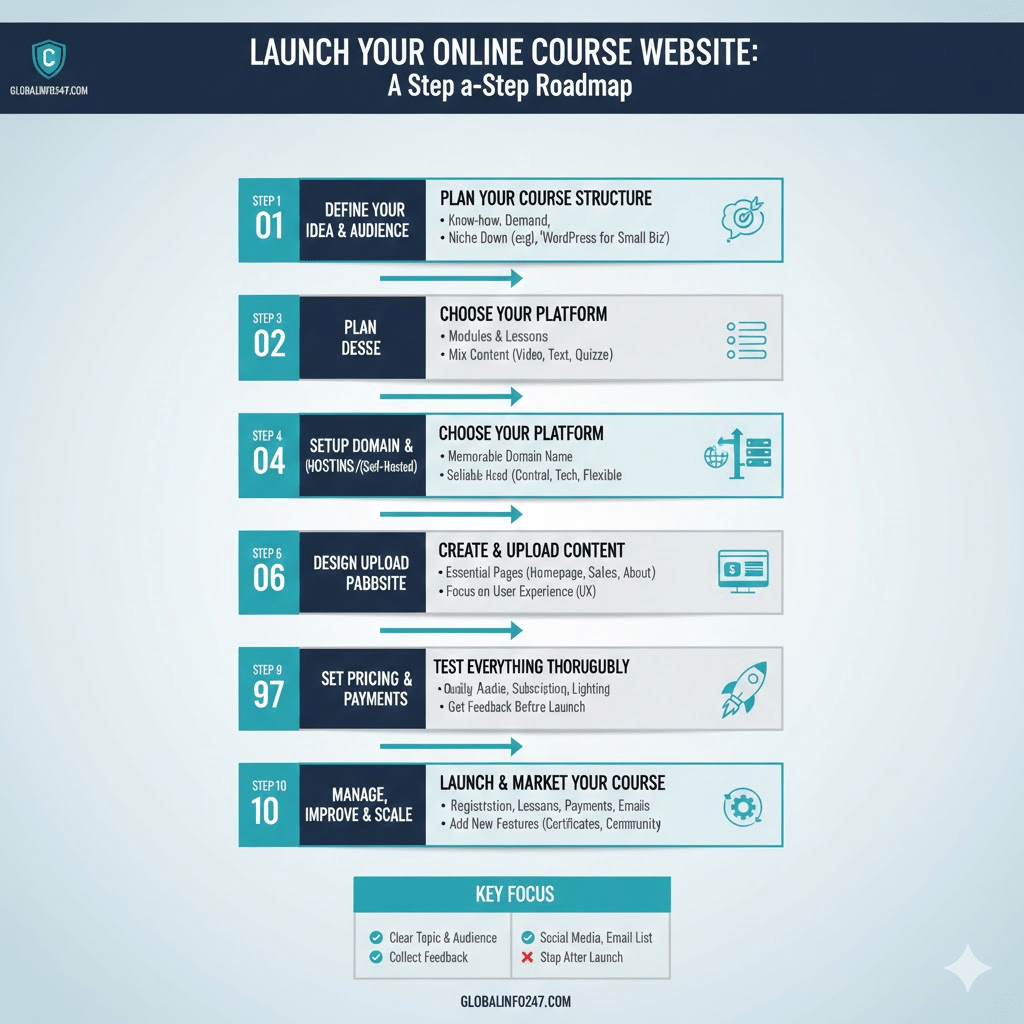
Step 1: Define Your Course Idea and Target Audience
Before building anything, you must be clear about what you are teaching and who it is for. This step determines everything else, including design, pricing, and marketing.
Identify a Clear Course Topic
Your course topic should sit at the intersection of:
- What you know well
- What people are willing to learn
- What solves a real problem
Instead of broad topics, narrow your focus. For example, “Web Development” is too wide, but “Building Small Business Websites with WordPress” is specific and easier to market.
Define Your Target Audience
Ask yourself:
- Who is this course for?
- What level are they (beginner, intermediate, advanced)?
- What problem are they trying to solve?
The clearer your audience, the easier it becomes to design lessons and communicate value.
Step 2: Plan Your Course Structure
A well-structured course keeps students engaged and improves completion rates.
Break the Course into Modules and Lessons
Modules are major sections, while lessons are individual teaching units within each module.
For example:
- Module 1: Introduction and Foundations
- Module 2: Core Concepts
- Module 3: Practical Applications
- Module 4: Advanced Techniques
Each lesson should focus on one clear idea. Avoid cramming too much into a single lesson.
Decide on Content Format
Online courses can include:
- Video lessons
- Text lessons
- Slides and PDFs
- Quizzes and assignments
- Downloadable resources
Video is the most popular format, but combining formats improves learning outcomes.
Step 3: Choose the Right Platform for Your Course Website
There are two main approaches to creating an online course website: hosted platforms and self-hosted websites.
Hosted Course Platforms
These platforms handle hosting, payments, and course delivery for you.
Examples include:
- Teachable
- Thinkific
- Podia
Advantages
- Easy to set up
- No technical skills required
- Built-in payment and student management
Disadvantages
- Monthly fees
- Limited customization
- Platform dependence
Self-Hosted Course Websites
This approach uses your own website, usually built with WordPress and learning management system (LMS) plugins.
Popular LMS plugins include:
- LearnDash
- LifterLMS
- Tutor LMS
Advantages
- Full control and customization
- Own your data and branding
- More flexible pricing models
Disadvantages
- Requires basic technical knowledge
- Initial setup takes longer
For beginners who want speed, hosted platforms are ideal. For long-term growth and control, self-hosted websites are often better.
Step 4: Get a Domain Name and Hosting (Self-Hosted Option)
If you choose a self-hosted website, you will need:
- A domain name (your website address)
- Web hosting (where your website lives)
Choosing a Domain Name
Your domain name should be:
- Easy to remember
- Related to your brand or course topic
- Simple and professional
Avoid long or complicated names.
Choosing Web Hosting
Look for hosting that offers:
- Good performance
- Strong security
- Reliable support
Many hosting providers offer WordPress-optimized plans, which simplify setup.
Step 5: Design Your Online Course Website
Design plays a big role in trust and usability. A clean, simple design is always better than a flashy but confusing one.
Essential Pages Your Website Needs
Your course website should include:
- Homepage
- Course sales page
- About page
- Contact page
- Login and dashboard pages
- Privacy policy and terms
Focus on User Experience
Make sure:
- Navigation is clear
- Buttons are easy to find
- Text is readable on mobile devices
- Pages load quickly
Students should be able to find lessons and continue learning without confusion.
Step 6: Create and Upload Course Content
This is the heart of your online course website.
Recording High-Quality Lessons
You do not need expensive equipment to start. Focus on:
- Clear audio
- Good lighting
- Organized presentation
Use simple tools like screen recorders, smartphones, or basic cameras.
Editing and Uploading Content
Edit videos to remove long pauses and mistakes. Keep lessons concise and focused.
Organize content inside your LMS or platform according to your planned structure. A clear sequence helps learners stay motivated.
Step 7: Set Pricing and Payment Options
Pricing your course correctly is crucial.
Common Pricing Models
- One-time payment
- Monthly subscription
- Tiered pricing (basic, premium)
- Bundled courses
Consider your audience, course length, and value provided when setting prices.
Payment Integration
Your website should support secure payments such as:
- Credit and debit cards
- Online payment gateways
- Regional payment options if applicable
A smooth checkout process reduces abandoned purchases.
Step 8: Test the Entire Learning Experience
Before launching, test everything thoroughly.
What to Test
- User registration and login
- Course enrollment
- Lesson navigation
- Video playback
- Payment processing
- Email notifications
Testing helps you catch issues that could frustrate students and damage credibility.
Step 9: Launch and Market Your Course Website
Launching your course is not the end—it is the beginning.
Basic Marketing Strategies
- Share content on social media
- Build an email list
- Offer free lessons or previews
- Write blog posts related to your course topic
Focus on showing value before asking people to buy.
Step 10: Manage, Improve, and Scale
Successful course creators continuously improve their content and platform.
Collect Student Feedback
Ask students:
- What they found helpful
- Where they struggled
- What could be improved
Use this feedback to update lessons and add value.
Add New Features Over Time
As your course grows, you can add:
- Certificates
- Community forums
- Live sessions
- Advanced courses
Growth should be gradual and based on student needs.
Creating an Online Course Website
| Step | Key Focus |
|---|---|
| Course idea | Clear topic and audience |
| Course structure | Modules and lessons |
| Platform choice | Hosted or self-hosted |
| Website setup | Domain, hosting, design |
| Content creation | Video, text, resources |
| Pricing | Value-based pricing |
| Launch | Marketing and testing |
| Growth | Feedback and improvements |
Frequently Asked Questions (FAQ)
1. Do I need technical skills to create an online course website?
No advanced technical skills are required, especially if you use hosted platforms. Self-hosted websites require some basic learning, but many tools simplify the process.
2. How long does it take to create an online course website?
It depends on course length and platform choice. A simple course can be launched in a few weeks, while larger projects may take several months.
3. Can I create an online course website for free?
Some platforms allow free plans with limitations. However, serious course creators usually invest in hosting, tools, or platform fees to deliver a better experience.
4. How many lessons should an online course have?
There is no fixed number. Focus on delivering results, not lesson count. Some courses succeed with 10 lessons, others with 100.
5. Is it possible to update the course after launch?
Yes. One advantage of online courses is that you can update content anytime. This keeps your course relevant and valuable.
Creating an online course website is a powerful way to share knowledge, help others, and build a sustainable digital product. The process may seem complex at first, but when broken into clear steps, it becomes manageable and rewarding.
Focus on clarity, quality, and the learner’s experience. Start simple, improve continuously, and stay committed to delivering real value. With the right approach, your online course website can grow into a long-term asset that benefits both you and your students.
Read Also: Cloudflare Setup Tutorial: Complete Beginner Walkthrough