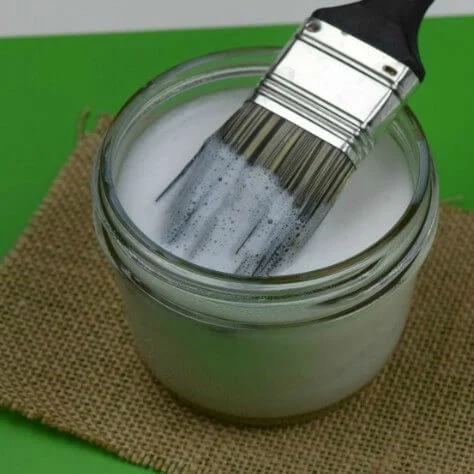
In this article, we’ll dive into what Mod Podge is and explore its numerous uses that can bring your creative projects to life. Additionally, we’ll discuss the benefits of making your own Mod Podge at home, providing you with a cost-effective and customizable alternative.
What is Mod Podge?
Mod Podge is a popular decoupage medium that was first introduced in the 1960s by Jan Wetstone, an innovator in the crafting world. Its name is derived from “modern decoupage,” and it has become a household name among crafters of all skill levels.
Mod Podge is primarily known for its three-in-one functionality, acting as an adhesive, sealer, and finisher. It is available in various formulations, including gloss, matte, satin, and more, allowing crafters to choose the finish that best suits their project.
Versatile Uses of Mod Podge
1. Collage Masterpiece
One of the most common uses of Mod Podge is creating collages. Whether you’re designing a personal vision board or crafting a unique gift, Mod Podge acts as the perfect adhesive to secure your images and elements in place. Its quick-drying nature ensures that your masterpiece comes together effortlessly.
2. Decoupage Delight
Mod Podge is the go-to choice for decoupage projects. Transform everyday objects such as wooden boxes, furniture, or ceramics into personalized works of art by adhering decorative paper or fabric with this adhesive. The end result is a seamless, professional-looking finish.
3. Jewelry Crafting
Read Also: 11 Amazing Health Benefits of Pineapples
Get creative with Mod Podge by designing your own jewelry. Seal and protect your paper or fabric pieces to create stunning earrings, pendants, or bracelets. Its versatility extends to crafting wearable art that reflects your style.
4. Home Decor Magic
Elevate your home decor game with Mod Podge. Use it to affix fabric to lampshades, decorate flower pots, or give old furniture a new lease on life. The possibilities are endless when it comes to enhancing your living space.
5. Kid-Friendly Fun
Mod Podge is safe for children to use, making it an excellent choice for family crafting projects. Kids can create personalized photo frames, decorate school supplies, or make their own greeting cards with ease.
Benefits of Making Mod Podge at Home

1. Cost-Effective Solution
One of the most compelling reasons to make your Mod Podge at home is cost savings. Commercial Mod Podge can be relatively expensive, especially if you’re working on large projects. By creating your own, you can save money while enjoying the same benefits.
2. Customizable Formulas
When you make Mod Podge at home, you have full control over the formula. You can adjust the consistency, finish, and even experiment with unique additives like glitter or colorant to achieve the desired effect for your project.
3. Reduce Waste
Creating your Mod Podge allows you to make just the amount you need, reducing waste. This environmentally friendly approach ensures that you’re not left with half-empty bottles of store-bought Mod Podge that may eventually dry out.
4. Learn a Valuable Skill
Crafting your own Mod Podge can be an enjoyable learning experience. It’s an opportunity to understand the chemistry behind this crafting staple and gain a deeper appreciation for your DIY projects.
Gather Your Supplies
Before we dive into making your very own Mod Podge at home, it’s essential to gather all the necessary supplies. Here’s what you’ll need:
Read Also: Old Clothes Recycling (Textile Recycling) Process Beginners Guide
- White school glue
- Water
- Airtight container
- Measuring cups and spoons
- Stirring utensil
Now that you have your crafting essentials in place, let’s move on to the next step.
Determine Your Ratios
Creating the perfect Mod Podge consistency is all about getting the glue-to-water ratio just right. Depending on your project and desired finish, you’ll want to select the appropriate ratio. Here are some common ratios for achieving various Mod Podge consistencies:
1. Classic Mod Podge
- For most projects, especially those involving paper, fabric, or decoupage, the classic Mod Podge consistency works wonders.
- To achieve this, mix one part white school glue with one part water. For example, if you use 1 cup of glue, add 1 cup of water.
- Thoroughly stir the mixture until it’s well combined. Make sure there are no lumps or streaks in the mix.
2. Matte Mod Podge
- If you prefer a matte finish for your project, you can easily create Matte Mod Podge at home.
- The ratio for Matte Mod Podge is the same as the classic version: one part white school glue to one part water.
- Follow the same steps as above to combine the glue and water, ensuring a smooth mixture.
3. Glossy Mod Podge
- For projects where you want a glossy, shiny finish, Glossy Mod Podge is the way to go.
- To make Glossy Mod Podge, again, use the one-to-one ratio of white school glue to water.
- Stir the mixture diligently until it’s completely blended and free of any clumps.
4. Hard Coat Mod Podge
- When durability is key, as in projects like table or furniture finishes, you can create Hard Coat Mod Podge.
- For Hard Coat Mod Podge, use a slightly different ratio: two parts white school glue to one part water.
- Mix the glue and water thoroughly until you achieve a robust, smooth consistency.
5. Sparkle Mod Podge
- Adding a touch of sparkle to your crafts is easy with Sparkle Mod Podge.
- Start with the classic one-to-one ratio of white school glue to water.
- If desired, sprinkle in some fine glitter into the mixture and stir until the glitter is evenly distributed. This version is perfect for adding a shimmering touch to your projects.
Once you’ve determined the right ratio for your Mod Podge, you’re ready to create your customized adhesive and finisher for your next crafting adventure. Store your homemade Mod Podge in an airtight container to keep it fresh and ready for your creative endeavors.
Prepare Your Workspace
Before you embark on the exciting journey of creating your own Mod Podge, it’s crucial to set up a clean and organized workspace. Here’s why it matters:
A clean and organized workspace offers several benefits:
- Efficiency: A clutter-free workspace allows you to work more efficiently. You won’t waste time searching for tools or materials when everything is neatly arranged.
- Safety: An organized space reduces the risk of accidents. Sharp tools, chemicals, or other potential hazards can be safely stored away from your working area.
- Inspiration: A tidy workspace is more inviting and conducive to creativity. It can inspire you to explore new ideas and stay focused on your projects.
To further protect your workspace, consider laying down newspaper or a drop cloth to catch any spills or drips. This not only helps maintain cleanliness but also prevents any accidental damage to surfaces.
Mix the Ingredients
Now that your workspace is prepped and ready, let’s dive into mixing your Mod Podge. Follow these step-by-step instructions for creating the perfect adhesive and finisher:
Step-by-Step Instructions for Mixing Glue and Water;
- Gather Your Ingredients: As mentioned earlier, you’ll need white school glue, water, airtight container, measuring cups, and a stirring utensil.
- Measure the Glue: Determine the amount of Mod Podge you need for your project and measure out the appropriate quantity of white school glue. Use a measuring cup or spoon for accuracy.
- Add Water: In a separate container, measure an equal amount of water. For the classic Mod Podge, use a one-to-one ratio of glue to water. If you’re making a different type, adjust the ratio accordingly.
- Combine Glue and Water: Pour the measured glue and water into a mixing container. It’s essential to use a container that’s easy to stir in and clean afterward.
- Stir Thoroughly: With your stirring utensil, begin mixing the glue and water together. Stir vigorously to ensure a smooth and consistent mixture. Pay close attention to the edges and corners of the container to eliminate any lumps or streaks.
- Check Consistency: The desired consistency for Mod Podge is a smooth, even blend of glue and water. If needed, continue stirring until you achieve this ideal texture.
- Use or Store: Your homemade Mod Podge is now ready for use in your crafting projects. If you have any leftover, transfer it to an airtight container for storage.
Remember that the type of Mod Podge you create will depend on your specific project requirements, so adjust the glue-to-water ratio accordingly. With your workspace prepared and your adhesive mixed to perfection, you’re well-equipped to bring your creative visions to life with your custom-made Mod Podge.
Read Also: Methods of Segmenting Industrial and Business Markets (Market Segmentation)
