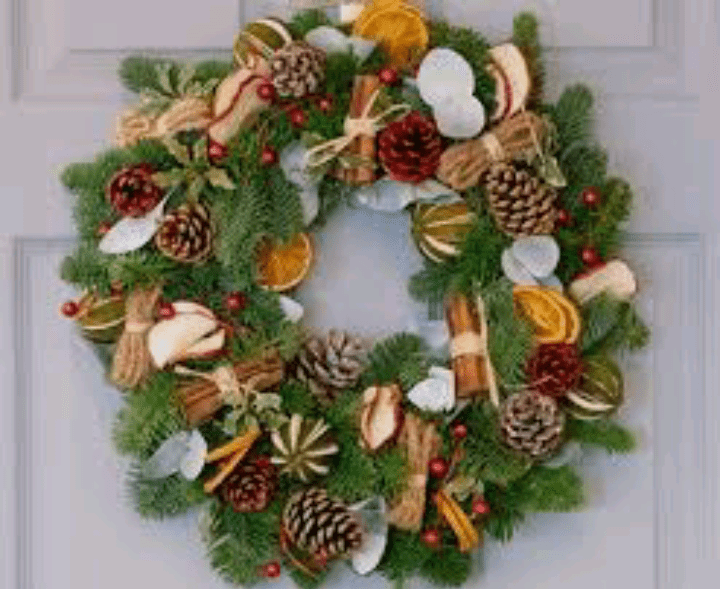
DIY Christmas wreath – a phrase that not only ushers in the festive season but also invites creativity and warmth into your home. As the holiday spirit fills the air, there’s something magical about crafting your own Christmas wreath, a timeless tradition that transforms simple materials into a symbol of joy.
Whether you’re a seasoned crafter or a novice, the allure of designing a personalized wreath is both enchanting and approachable. In this article, we embark on a journey of festive creativity, exploring the art of making a DIY Christmas wreath from start to finish.
With a handful of readily available materials, a touch of inspiration, and a sprinkle of holiday magic, you’ll soon discover how crafting your own wreath is not just a decorative activity but a heartfelt expression of the season’s spirit. Join us as we go into the world of wreath-making, providing step-by-step guidance and relatable examples that make this delightful DIY project accessible to everyone.
Let the joy of the holidays fill your home as we unravel the secrets to creating a personalized Christmas wreath that will be the perfect adornment for your door, walls, or even a thoughtful gift for loved ones. Get ready to infuse your home with the festive cheer that comes from the simple act of crafting and displaying a DIY Christmas wreath made with love and creativity.
Read also: DIY Lip Scrub: Unveiling the Secrets to Silky, Smooth Lips
DIY Christmas Wreath

1. Gathering Materials
To embark on your journey of crafting a DIY Christmas wreath, it’s essential to gather the right materials. Here’s a list to get you started:
- Wreath Base:
- Wire wreath frame
- Grapevine wreath
- Styrofoam wreath form
- Foliage:
- Pine branches
- Cedar branches
- Holly leaves
- Eucalyptus sprigs
- Decorative Elements:
- Ornaments
- Pinecones
- Berries
- Ribbon
- Adhesives:
- Hot glue gun
- Floral wire
- Tools:
- Pruning shears
- Wire cutters
2. Choosing a Theme
Before diving into the assembly process, consider choosing a theme for your wreath. Whether it’s a traditional red and green color scheme or a more modern and eclectic look, having a theme will guide your material and decoration choices. Let’s explore a couple of themes to provide inspiration:
- Classic Elegance:
- Traditional red and green color palette
- Gold or silver accents
- Velvet ribbon and ornaments
- Rustic Charm:
- Natural, earthy tones
- Burlap ribbon
- Wooden ornaments and pinecones
- Winter Wonderland:
- Icy blues and whites
- Snowflake ornaments
- Glittery accents
Read also: DIY Solar Panels: Harnessing Sunshine for a Brighter Tomorrow
3. Creating the Base
The foundation of your DIY Christmas wreath is crucial for its stability and structure. Depending on the type of wreath base you’ve chosen, the approach may differ slightly.
- Wire Wreath Frame:
- Secure the end of the foliage (pine branches, cedar, etc.) to the frame using floral wire.
- Continue wrapping the foliage around the frame, overlapping each layer for a full look.
- Use the pruning shears to trim excess branches, ensuring a neat appearance.
- Grapevine Wreath:
- Weave the foliage into the grapevine, securing it with floral wire where needed.
- Allow the natural twists and turns of the grapevine to dictate the wreath’s shape.
- Styrofoam Wreath Form:
- Use the hot glue gun to attach the foliage directly to the Styrofoam.
- Layer the foliage until the form is completely covered, creating a lush and textured base.
4. Adding Decorative Elements
Now that you have a sturdy base, it’s time to infuse personality into your wreath with carefully chosen decorative elements.
- Ornaments:
- Strategically place ornaments around the wreath, securing them with hot glue or floral wire.
- Consider a mix of sizes and shapes for visual interest.
- Pinecones:
- Dab a bit of hot glue on the base of each pinecone and nestle them into the foliage.
- Vary the placement for a balanced look.
- Berries:
- Thread berries onto floral wire and tuck them into the wreath.
- Opt for red berries for a classic touch or white for a more wintry feel.
- Ribbon:
- Create a bow using wired ribbon, allowing for easy shaping and positioning.
- Attach the bow to the wreath with floral wire or hot glue.
5. Personalizing Your Wreath
The beauty of a DIY Christmas wreath lies in its uniqueness. Personalize your creation to make it truly yours.
- Family Keepsakes:
- Integrate family ornaments or trinkets into the wreath for sentimental value.
- Consider miniature photo frames showcasing cherished memories.
- Monogram:
- Add a monogram to the wreath using wooden or metallic letters.
- Paint or decorate the letters to match your chosen theme.
- Nature-Inspired Accents:
- Attach small bird figurines or nestle faux birds within the foliage for a natural touch.
- Incorporate small pinecones and acorns for added texture.
6. Finishing Touches
As you approach the completion of your DIY Christmas wreath, take a moment to assess the overall balance and make any necessary adjustments.
- Balance and Symmetry:
- Step back and view your wreath from a distance to ensure a balanced distribution of elements.
- Adjust any ornaments or decorations that may be overwhelming one section.
- Securing Loose Ends:
- Check for any loose branches, ornaments, or ribbon and secure them with additional hot glue or floral wire.
- Enhancing Fragrance:
- Consider incorporating scented elements like cinnamon sticks or dried citrus slices for an aromatic touch.
7. Displaying Your Masterpiece
Now that your DIY Christmas wreath is complete, it’s time to find the perfect spot to showcase your masterpiece.
- Front Door:
- Hang your wreath on the front door to welcome guests with festive cheer.
- Use an over-the-door wreath hanger for easy installation.
- Indoor Décor:
- Adorn interior doors or walls with smaller wreaths to spread holiday joy throughout your home.
- Consider hanging wreaths in unexpected places, such as above the fireplace or on kitchen cabinets.
- Gift Giving:
- Share the joy of crafting by gifting personalized wreaths to friends and family.
- Attach a heartfelt note explaining the inspiration behind your design.
