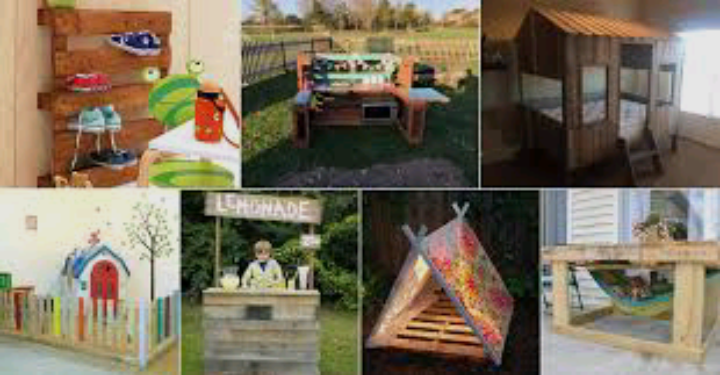
Are you ready to embark on a journey of creativity and resourcefulness? Look no further than the world of DIY pallet projects, where the humble pallet transforms into something extraordinary. In a society that often rushes past the joy of hands-on creation, these projects offer a simple yet powerful way to reconnect with craftsmanship.
From crafting functional furniture to adding a touch of personality to your living space, DIY pallet projects open a door to a world where simplicity meets ingenuity.
The beauty of DIY pallet projects lies in their accessibility. Pallets, often overlooked and discarded, become the raw material for your creative endeavors. In this article, we’ll explore the basics of working with pallets, the essential tools you’ll need, and step-by-step guides for popular projects.
Whether you’re a seasoned DIY enthusiast or a novice eager to try your hand at crafting, these projects cater to all skill levels, providing an opportunity to learn and grow.
As we go into the fascinating world of pallet crafting, keep in mind the affordability, sustainability, and customization that these projects offer. Transforming pallets into personalized pieces not only breathes new life into discarded materials but also allows you to infuse your living space with a unique charm that store-bought items often lack.
So, roll up your sleeves, gather your tools, and let’s dive into the exciting realm of DIY pallet projects together.
Whether you’re looking to furnish your home on a budget, create meaningful gifts, or simply unwind through creative expression, these projects are the perfect starting point for your hands-on adventure. Get ready to unleash your creativity and discover the endless possibilities that await in the world of DIY pallet projects!
Read also: DIY Face Masks: Unveiling the Art of Crafting Natural Skincare Solutions
DIY Pallet Projects

I. Understanding Pallets
Before going into the realm of DIY projects, it’s crucial to understand the basic building block – pallets. Pallets are wooden structures used to transport goods, often overlooked and discarded after their primary use. However, these seemingly mundane items can be repurposed into stunning pieces of furniture and décor with a bit of creativity and effort.
II. Selecting the Right Pallets
Not all pallets are created equal, and selecting the right ones is the first step in any DIY pallet project. Look for pallets with intact boards, minimal damage, and no signs of chemical treatment. Avoid pallets with stains, strange odors, or markings indicating they’ve been treated with harmful substances.
III. Popular Types of DIY Pallet Projects
- Pallet Furniture
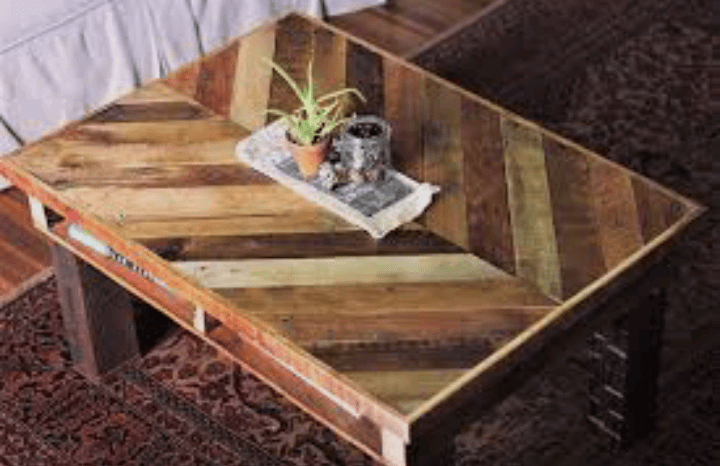
One of the most popular avenues for pallet repurposing is furniture. From rustic coffee tables to stylish outdoor loungers, the possibilities are endless. A simple project for beginners could involve transforming a couple of pallets into a basic coffee table. Sand the surfaces to remove rough edges, paint or stain them to your liking, and attach them with sturdy screws for a functional yet stylish addition to your living space.
- Vertical Gardens
For the green-thumbed DIY enthusiast, creating a vertical pallet garden can be a rewarding project. Stand a pallet upright, secure the back with a durable cloth or landscaping fabric, fill each compartment with soil, and plant herbs, flowers, or succulents. This not only adds a touch of nature to your surroundings but also maximizes limited space.
- Pallet Shelves
Need more storage without sacrificing style? Pallet shelves are an excellent solution. Mount a pallet horizontally on the wall, securing it with proper anchors. Sand and finish the wood to your liking, and you have a unique and practical shelving unit for displaying books, plants, or decorative items.
- Pallet Bed Frame
Upgrade your bedroom with a DIY pallet bed frame. Combine several pallets to create a sturdy base, ensuring they are securely fastened. Sand the surfaces for a smooth finish and add a coat of paint or stain to match your bedroom decor. Top it with a comfortable mattress, and you have a customized bed that adds character to your space.
- Pallet Wine Rack
Wine enthusiasts can indulge their passion with a pallet wine rack. Remove a few boards from a pallet, add wine glass holders underneath, and secure it to the wall. This functional and visually appealing addition not only showcases your wine collection but also serves as a conversation piece for your home.
- Pallet Wall Art
For those who appreciate the aesthetic side of DIY, creating pallet wall art is a delightful project. Disassemble a pallet and arrange the boards in a visually pleasing pattern. Stain or paint each piece individually, then reassemble them into a larger artwork. This customizable approach allows you to express your artistic side while recycling materials.
IV. Tools and Materials
Before embarking on any DIY pallet project, it’s essential to gather the necessary tools and materials to ensure a smooth and successful crafting experience. Basic tools such as a saw, drill, sandpaper, and screws are indispensable. Additionally, depending on the complexity of the project, you might need paint, stain, varnish, or sealant to enhance the aesthetics and durability of your creation.
V. Safety First
While DIY projects are an excellent way to express creativity, safety should always be a top priority. When working with pallets, wear protective gear, including gloves and safety glasses, to prevent splinters and injuries. Ensure that your workspace is well-ventilated, especially when sanding or painting, and follow all safety guidelines for the tools you’re using.
Read also: Gnat Trap DIY: A Simple Solution to Banish Pesky Gnats
VI. Step-by-Step Guide: Creating a Pallet Coffee Table
To illustrate the DIY process, let’s explore a step-by-step guide for creating a simple yet stylish pallet coffee table.
Step 1: Gather Materials
For this project, you’ll need:
- Two pallets in good condition
- Sandpaper or an electric sander
- Paint or stain of your choice
- Paintbrushes or a paint sprayer
- Screws
- Power drill
- Saw
Step 2: Disassemble the Pallets
Carefully disassemble one of the pallets by removing the boards. This will provide the individual pieces needed for the tabletop.
Step 3: Sand the Boards
To ensure a smooth and splinter-free surface, sand each board thoroughly. Focus on the corners and edges to achieve a polished look.
Step 4: Paint or Stain
Apply your chosen paint or stain to each board, allowing it to dry completely between coats. This is an opportunity to get creative with colors or maintain a more natural, rustic appearance.
Step 5: Arrange the Boards
Lay out the painted or stained boards in the desired pattern for your tabletop. Ensure they fit together snugly to form a cohesive surface.
Step 6: Attach the Boards
Once satisfied with the arrangement, flip the boards over and attach them using screws. Make sure the screws are evenly spaced and securely fastened to create a sturdy tabletop.
Step 7: Prepare the Base
Take the second pallet and determine the desired height for your coffee table. Trim the pallet legs accordingly, ensuring a level and stable base.
Step 8: Attach the Tabletop to the Base
Position the tabletop on the prepared base and secure it with screws. Be mindful of the placement to achieve a balanced and visually appealing final product.
Step 9: Finishing Touches
Inspect your coffee table for any rough edges or imperfections. Sand or touch up as needed, and consider adding a clear sealant for added durability.
Step 10: Enjoy Your Creation
Place your DIY pallet coffee table in your living space and revel in the satisfaction of creating a functional and personalized piece of furniture.
VII. Creative Variations
While the basic coffee table project is a great starting point, there are numerous creative variations to explore:
- Multi-Level Coffee Table: Stack two or more pallets to create a multi-level coffee table with additional storage space.
- Colorful Mosaic: Paint each board in a different color or create a vibrant mosaic pattern for a visually striking tabletop.
- Wheel Addition: Attach wheels to the base for a mobile coffee table that can be easily moved around your living space.
- Glass Top: Place a custom-cut glass top on your pallet coffee table for a sleek and modern finish.
- Incorporate Storage: Add a lower shelf to the base for additional storage, perfect for magazines, books, or decorative baskets.
VIII. Benefits of DIY Pallet Projects
Engaging in DIY pallet projects offers a multitude of benefits, extending beyond the joy of creating something with your hands. Let’s explore some of the advantages:
- Cost-Effective: Pallets are often discarded or available at minimal cost, making DIY pallet projects an affordable way to enhance your home.
- Sustainability: Repurposing pallets contributes to a more sustainable lifestyle by reducing waste and giving new life to existing materials.
- Customization: DIY projects allow for complete customization. Whether you prefer a rustic, shabby-chic look or a sleek, modern finish, you have the creative freedom to design according to your taste.
- Skill Development: Engaging in DIY projects provides an opportunity to develop and hone various skills, from woodworking to painting and decorating.
- Sense of Accomplishment: Completing a DIY pallet project provides a tangible sense of accomplishment, boosting confidence and inspiring further creativity.
- Unique Home Decor: Stand out from store-bought furniture by incorporating unique, handcrafted pieces into your home decor.
