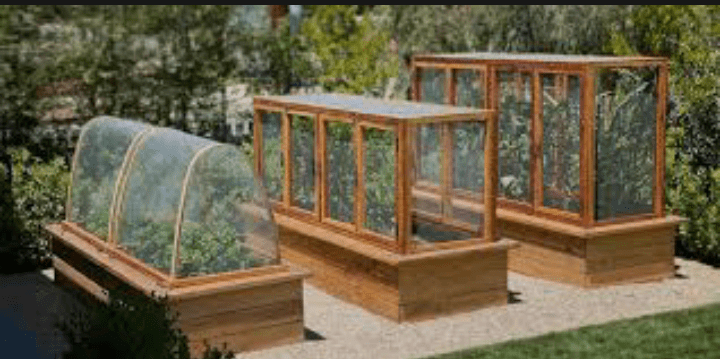
Are you ready to turn that corner of your yard into a flourishing oasis of fresh produce and vibrant flowers? Building your DIY raised garden bed is the first step toward cultivating your green thumb and creating a thriving garden space.
In this guide, we’ll explore the straightforward process of constructing a raised garden bed, offering you a pathway to unleash your inner gardener and enhance your outdoor space.
Gardening in a raised bed offers numerous advantages, making it an ideal choice for both beginners and seasoned gardeners. With this approach, you’ll have better control over the soil quality, improved drainage, and easier access for planting, weeding, and harvesting.
Whether you’re aiming to grow vegetables, herbs, or a colorful array of flowers, a raised garden bed provides a customizable and manageable environment for your plants to thrive.
The beauty of a DIY raised garden bed lies in its adaptability to fit your space and preferences. You can choose the size, shape, and materials that best suit your needs and available resources.
Not only is this an opportunity to exercise your creativity, but it’s also a chance to craft a personalized, sustainable garden that reflects your style and supports the growth of a wide variety of plants.
This guide will walk you through the step-by-step process, from planning and preparation to constructing the bed, filling it with the right soil mix, and finally planting and maintaining your garden.
By the end of this journey, you’ll be equipped with the knowledge and confidence to create a vibrant raised garden bed that promises a harvest of joy and natural beauty right in your own backyard.
Read Also: DIY Fruit Fly Trap: A Simple Solution to Tackle Pesky Pests
DIY Raised Garden Bed

Step 1: Planning and Preparation
Before go into the construction, take some time to plan your raised bed. Consider the size, location, and materials you’ll use.
a. Size and Shape: Determine the size of your garden bed based on available space and the types of plants you wish to grow. Common dimensions are 4×4 feet or 4×8 feet, but feel free to customize to your preference.
As for shape, rectangular or square beds are the most straightforward, but circular or uniquely shaped beds can add aesthetic appeal.
b. Location: Choose a spot that receives adequate sunlight for the plants you want to grow. Ensure it’s easily accessible for watering and maintenance.
c. Materials: There are various options for building materials. Cedar and redwood are popular choices due to their natural resistance to decay. Alternatively, you can use composite lumber, bricks, or stones. Ensure the materials are non-toxic and won’t leach harmful chemicals into the soil.
Step 2: Constructing the Raised Bed
Once you’ve gathered your materials and prepared the area, it’s time to start building.
a. Assembling the Frame: Cut your chosen lumber or assemble your chosen materials to the desired dimensions. Using galvanized screws or nails, join the boards securely at the corners. If you’re using stone or bricks, stack them securely, ensuring they form a stable wall.
b. Adding a Bottom Layer (Optional): Some gardeners prefer to add a bottom layer to prevent weeds or critters from entering the bed. Use landscaping fabric or cardboard at the bottom before filling with soil, allowing for proper drainage.
c. Installing Support: If your raised bed is particularly wide or tall, it might benefit from internal supports to prevent bowing or bulging over time. You can use stakes or braces on the inside of the bed to provide additional support.
Read Also: Suya Spice (Yaji): Recipe, Preparation & Facts
Step 3: Filling the Bed
The quality of your soil is crucial for a thriving garden. Fill the bed with a good mix of soil that provides proper drainage and nutrients.
a. Soil Mixture: A recommended mixture for raised beds is equal parts of garden soil, compost, and a lightweight material like perlite or vermiculite for improved drainage. This mixture promotes healthy plant growth.
b. Leveling and Watering: After filling, ensure the soil is evenly distributed and water it thoroughly. This helps settle the soil and initiates a stable environment for your plants.
Step 4: Planting and Maintenance
Now that your raised garden bed is ready, it’s time to start planting and caring for your crops.
a. Planting: Follow the planting instructions for each type of plant you choose. Consider the spacing between plants and their sunlight, water, and soil requirements.
b. Weeding and Watering: Regularly weed your garden bed to prevent unwanted growth. Water the plants consistently, checking the moisture levels in the soil to maintain adequate hydration.
c. Seasonal Maintenance: In colder climates, consider insulating your raised bed with mulch or covering it during winter. Regularly add compost or organic matter to replenish nutrients in the soil.
Read Also: Effects of Pollution on Fish, Algae, Zooplankton, Benthic Organisms, and Water Quality
