DIY Headboard: Transforming Bedrooms with Your Personal Touch
Ever looked at your bedroom and thought, “There’s something missing”? Enter the world of DIY headboards, where a simple yet impactful addition can redefine the entire vibe of your sleeping sanctuary. In this guide, we’ll explore the magic of crafting your own headboard, a hands-on venture that not only elevates your bedroom aesthetics but also adds a dash of your unique personality.
A DIY headboard is more than just a piece of furniture; it’s a canvas for your creativity, an opportunity to infuse your personal style into the heart of your home. Whether you’re a seasoned DIY enthusiast or just testing the waters, the prospect of designing and building your headboard brings a sense of accomplishment and satisfaction.
Picture this: a cozy retreat where your headboard, crafted by your own hands, becomes the focal point of the room. It’s not just about saving a few bucks; it’s about creating a space that tells your story. From rustic wooden wonders to elegant upholstered designs or even contemporary metal marvels, the possibilities are as diverse as your imagination.
In the following chapters, we’ll guide you through the process step by step, from choosing the right materials to designing a headboard that suits your style. Each section offers relatable examples, showcasing how individuals with different tastes and skill levels have transformed their bedrooms with a touch of DIY magic.
So, whether you’re yearning for a minimalist chic retreat, a touch of rustic charm, or an eclectic fusion of styles, this guide is your ticket to a bedroom makeover. Get ready to roll up your sleeves, gather your materials, and embark on a creative journey to a more personalized and inviting bedroom oasis.
Read also: DIY Murphy Bed: Unlocking Space-Saving Comfort
DIY Headboard

1. Understanding the Importance of a Headboard
Before going into the world of DIY headboards, let’s first explore why this seemingly simple piece of furniture holds such significance in bedroom design. A headboard serves both functional and aesthetic purposes. Functionally, it provides a comfortable support for sitting up in bed, reading, or watching TV. Aesthetically, it anchors the bed in the room and acts as a focal point, contributing to the overall style and theme of the bedroom.
A. Functionality and Comfort
A well-designed headboard offers more than just a decorative element; it provides a supportive surface for leaning against, making activities like reading or working in bed more comfortable. Consider the angle and height of your headboard to ensure it complements your lifestyle and daily activities.
B. Aesthetic Impact
Your headboard sets the tone for the entire bedroom. It can convey a sense of luxury, warmth, or simplicity, depending on the materials and design chosen. DIY headboards allow you to infuse your personal style into the design, creating a space that truly feels like home.
2. Choosing the Right Materials
The beauty of DIY projects lies in the freedom to choose materials that resonate with your style and budget. Whether you prefer the rustic charm of reclaimed wood or the modern sleekness of metal, the possibilities are vast.
A. Wooden Wonders
Wood is a versatile material that can be adapted to various styles. Consider reclaimed wood for a rustic, weathered look, or opt for polished plywood for a modern and sleek appearance. Wooden pallets are another excellent choice, offering an eco-friendly option that can be transformed into a unique headboard with a bit of creativity.
- Example: Sarah, a DIY enthusiast, repurposed an old barn door into a stunning headboard for her farmhouse-style bedroom. The natural patina of the wood added character and charm to the space, creating a focal point that told a story.
B. Upholstered Elegance
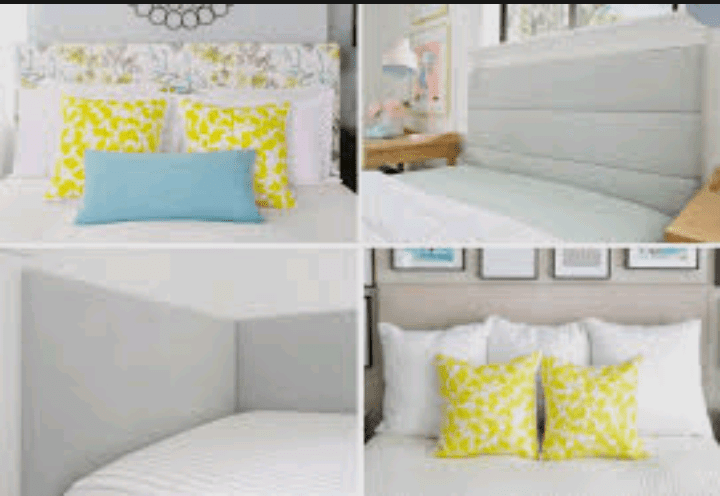
Upholstered headboards add a touch of luxury and comfort to any bedroom. Choose a fabric that complements your existing decor, and consider adding tufting or decorative buttons for a sophisticated look. DIY upholstered headboards are surprisingly achievable with some basic sewing skills and a sturdy plywood base.
- Example: James, a budget-conscious decorator, transformed a plain plywood board into a plush upholstered headboard using an old comforter and some staple gun magic. The result was a cozy and inviting focal point that made his bedroom feel like a boutique hotel suite.
C. Metal Marvels
For a sleek and modern aesthetic, consider working with metal. Materials like wrought iron or copper pipes can be shaped and welded into intricate designs. Metal headboards are not only durable but also lend an air of sophistication to the bedroom.
- Example: Emily, a design enthusiast, crafted a geometric metal headboard using copper pipes. The reflective surface added a touch of glamour to her minimalist bedroom, creating a striking contrast with the neutral color palette.
3. Designing Your Dream Headboard
Once you’ve chosen the material, it’s time to get creative with the design. Your headboard can be as simple or as intricate as you desire, and this is where your personality can truly shine through.
A. Minimalist Chic
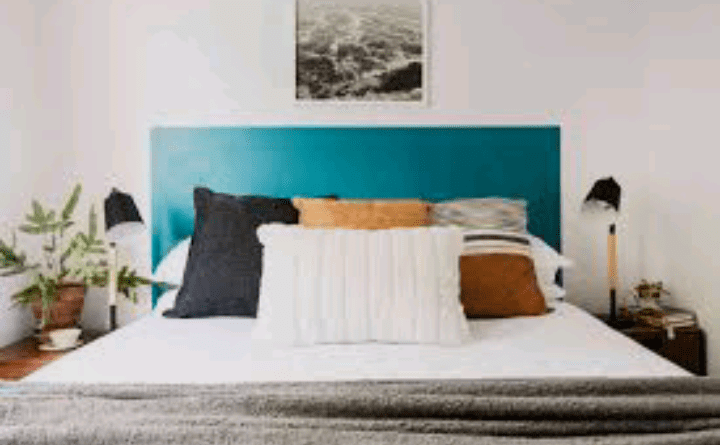
Minimalist design is all about simplicity and functionality. A straightforward, clean-lined headboard can create a sense of calm and order in your bedroom. Consider using a single, solid material or a subtle combination of materials for a modern and understated look.
- Example: Alex, a fan of Scandinavian design, crafted a minimalist headboard using a single sheet of plywood. The natural wood grain and clean lines added warmth to his bedroom, creating a serene and inviting atmosphere.
B. Rustic Charm
Embrace the coziness of a rustic headboard by incorporating natural and weathered materials. Reclaimed wood, distressed finishes, and earthy tones can transport your bedroom to a charming cottage or farmhouse, providing a comforting and timeless aesthetic.
- Example: Rachel, a DIY enthusiast with a love for all things vintage, repurposed an old wooden door into a rustic headboard. A light sanding and a coat of clear varnish preserved the character of the wood, infusing her bedroom with a sense of history and nostalgia.
C. Eclectic Fusion
If you’re drawn to a mix of styles and materials, consider creating an eclectic headboard that blends various elements harmoniously. Combine different textures, colors, and shapes to tell a unique story and showcase your diverse tastes.
- Example: Max, a creative soul with a passion for art, crafted an eclectic headboard using a mix of salvaged metal, fabric remnants, and old picture frames. The result was a vibrant and visually engaging masterpiece that reflected his personality and love for unconventional design.
Read also: Mastering the Art of DIY Shelves: A Comprehensive Guide
4. Step-by-Step DIY Headboard Construction
Now that you have a vision for your DIY headboard, it’s time to roll up your sleeves and bring your design to life. This step-by-step guide will walk you through the basic process, but feel free to adapt and modify based on your chosen materials and design.
A. Gathering Materials and Tools
Before you begin, ensure you have all the necessary materials and tools. This may include wood or metal for the frame, padding and fabric for upholstery, screws, a saw, sandpaper, a staple gun, and any decorative elements you plan to incorporate.
B. Measuring and Cutting
Measure the width of your bed and the desired height of your headboard. Use these measurements to cut your chosen material to the appropriate size. If you’re opting for a more intricate design, create a template or stencil to guide your cuts.
C. Assembling the Frame
If your design includes a frame, assemble it using screws or welding, depending on your chosen material. Ensure that the frame is sturdy and will securely support the weight of the headboard.
D. Adding Padding and Upholstery (if applicable)
If you’ve chosen an upholstered design, add padding to the front of the headboard. This can be foam, batting, or even an old mattress topper. Stretch your chosen fabric tightly over the padding, securing it to the back of the headboard with a staple gun.
E. Adding Decorative Elements
This is the stage where you can get creative with decorative elements. Whether it’s tufting, nailhead trim, or painted designs, now is the time to add those finishing touches that will make your headboard uniquely yours.
F. Mounting the Headboard
Once your headboard is complete, it’s time to mount it to the bed frame or directly to the wall, depending on your design. Use appropriate screws and anchors to ensure stability.
5. Finishing Touches and Maintenance
With your DIY headboard in place, take a moment to appreciate the transformation of your bedroom. However, the journey doesn’t end here. Proper care and maintenance will ensure that your headboard remains a beautiful and functional part of your bedroom decor.
A. Regular Cleaning
Depending on the material and finish, your headboard may require different cleaning methods. Dust wooden headboards regularly and consider applying a protective sealant to prevent damage. Upholstered headboards can be vacuumed or spot cleaned according to the fabric’s care instructions.
B. Seasonal Updates
One of the advantages of a DIY headboard is the flexibility to update it with the seasons or as your tastes evolve. Consider changing the upholstery, adding seasonal decor, or incorporating new elements to keep your bedroom fresh and exciting.
C. Repair and Restoration
Over time, wear and tear may occur. Keep an eye out for any loose screws, damaged upholstery, or fading, and address these issues promptly to prolong the lifespan of your headboard.
Read also: Operation and Maintenance for Communitor and Grinder


