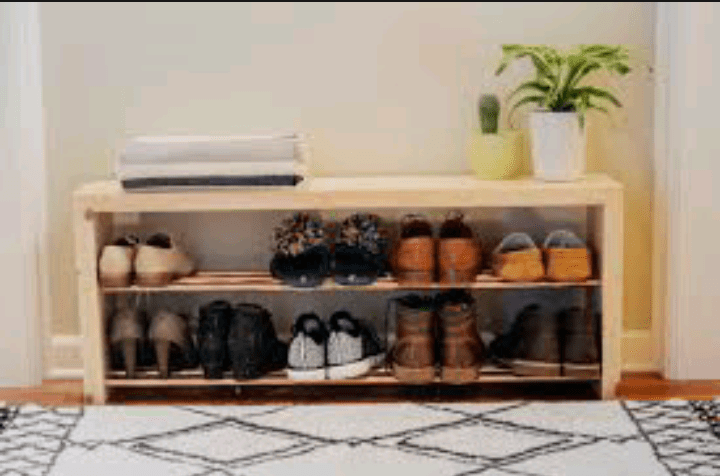
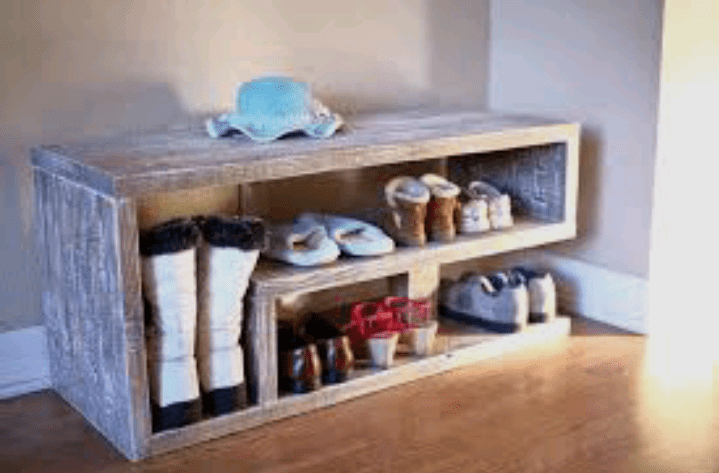
Are your shoes constantly scattered around the entrance, making it feel like a maze just to find a matching pair? Fear not! In this guide, we’re diving into the world of DIY with a simple solution: the DIY shoe rack. If you’ve ever wished for a neat and organized entryway that greets you with a sense of order, this is the perfect project for you.
In the hustle and bustle of daily life, a dedicated space for your footwear can make a world of difference. No more tripping over misplaced shoes or spending precious minutes searching for the right pair. A DIY shoe rack is not just a piece of furniture; it’s a practical and stylish solution to decluttering your space.
This article will walk you through the step-by-step process of creating your very own shoe rack. From choosing the right materials at your local hardware store to exploring design ideas that suit your style, we’ll cover it all. You don’t need to be a carpentry expert; a simple measuring tape, some wood, and a dash of creativity are all you need to get started.
Imagine the satisfaction of walking into your home and being greeted by a tidy array of neatly organized shoes. Whether you have a penchant for classic wooden designs, floating shelves, or repurposed crates, we’ve got you covered. Crafting convenience has never been so accessible.
Get ready to transform your entryway, simplify your routine, and embrace the joy of a DIY project that not only serves a purpose but also reflects your personal style. Let’s embark on this journey together and step into a world where every pair of shoes has its place – a world crafted by you, for you.
Read also: From Idea To Maturity: The 5 Stages Of Business Growth
DIY Shoe Rack

1. Understanding the Need:
Before embarking on the DIY journey, it’s essential to understand why a shoe rack is a valuable addition to your living space. Beyond the obvious benefits of decluttering and enhancing aesthetics, a shoe rack contributes to the longevity and condition of your footwear. By providing a designated space for your shoes, you prevent them from getting scuffed, misshapen, or lost, ultimately extending their lifespan.
2. Materials:
The first step in crafting your DIY shoe rack is gathering the necessary materials. Fortunately, many of these materials can be found at your local hardware store or repurposed from items you may already have at home.
Wood: Choose a sturdy wood for the frame of your shoe rack. Pine, cedar, or plywood are excellent choices due to their durability and ease of manipulation.
Measuring Tape and Pencil: Accurate measurements are key to ensuring your shoe rack fits seamlessly into your space. A measuring tape and pencil will be your best friends during this process.
Saw: Depending on the complexity of your design, you may need a saw to cut the wood to the desired dimensions.
Sandpaper: Smooth out rough edges and surfaces with sandpaper, ensuring your shoe rack is not only functional but also safe to use.
Wood Glue and Screws: These will be essential for securing the different components of your shoe rack. Wood glue provides additional stability, while screws ensure a robust and lasting structure.
Paint or Stain (Optional): To add a personal touch and match your shoe rack to your existing décor, consider using paint or stain.
3. Design Considerations:
With materials in hand, it’s time to consider the design of your DIY shoe rack. The design should not only align with your aesthetic preferences but also accommodate the number and types of shoes you own. Here are a few design ideas to inspire your project:
Classic Wooden Rack: A simple, open design with multiple shelves, allowing for easy access and visibility of all your shoes.
Floating Shoe Shelves: Maximize vertical space by creating floating shelves that appear to “float” on the wall. This design is not only functional but also adds a modern touch to your space.
Crate Shoe Rack: Repurpose wooden crates as individual compartments for your shoes. This design is both rustic and practical.
Multi-Functional Bench: Combine a shoe rack with a bench for seating while putting on or taking off your shoes. This is an excellent space-saving solution for smaller entryways.
Read also: The Magic of Reading Aloud to Babies
4. Step-by-Step Construction:
Now that you have a design in mind, let’s walk through the step-by-step process of constructing your DIY shoe rack.
Step 1: Measure Your Space
Using your measuring tape, determine the dimensions of the area where your shoe rack will be placed. Consider the height, width, and depth to ensure a perfect fit.
Step 2: Choose Your Design
Based on your measurements and preferences, choose a design for your shoe rack. Sketch it out on paper to visualize the final product.
Step 3: Gather Materials
Collect all the materials you’ll need for your chosen design. This is the stage where you can make decisions about the type of wood, paint or stain color, and any additional decorative elements.
Step 4: Cut the Wood
Using a saw, carefully cut the wood pieces according to your design and measurements. Take your time to ensure precision, as accurate cuts are crucial for the stability of your shoe rack.
Step 5: Sand the Edges
Smooth out any rough edges or surfaces with sandpaper. This step is essential for both the safety and aesthetics of your finished shoe rack.
Step 6: Assemble the Frame
Using wood glue and screws, assemble the frame of your shoe rack. Follow your design, ensuring that each piece is securely attached to the next. Allow the glue to dry completely before moving on to the next step.
Step 7: Add Shelves or Compartments
If your design includes shelves or compartments, attach them to the frame using a combination of wood glue and screws. Ensure that each shelf is level and securely attached for stability.
Step 8: Optional Painting or Staining
If you’ve chosen to paint or stain your shoe rack, now is the time to do so. Apply the paint or stain evenly, allowing each coat to dry before applying the next. This step adds a personalized touch to your creation.
Step 9: Finishing Touches
Inspect your DIY shoe rack for any imperfections or loose components. Make any necessary adjustments, and add any finishing touches, such as decorative knobs or hooks.
Step 10: Install in Your Space
Finally, install your DIY shoe rack in the designated space. Ensure it is level and secure, and take a moment to appreciate the functional and aesthetic improvement it brings to your home.
5. Maintenance and Care:
Now that your DIY shoe rack is proudly standing in your entryway, it’s essential to implement proper maintenance and care to keep it in optimal condition.
Regular Cleaning: Dust and dirt can accumulate on your shoe rack over time. Regularly wipe it down with a damp cloth to keep it clean and free from debris.
Shoe Rotation: To prevent excessive wear on specific areas of the rack, consider rotating the placement of your shoes periodically.
Inspect for Damage: Keep an eye out for any signs of damage or instability. Tighten screws if needed and address any issues promptly to ensure the longevity of your DIY creation.
Read also: Cost of Starting a Waste Management Business
